
Permits for hiking in Havasupai are always for 3 nights/4 days, allowing 2 full days in Havasu Canyon to explore the waterfall along Havasu Creek. Our recommended Havasupai Itinerary outlines everything first time hikers need to know to prepare for the trail conditions and distance to each of the waterfalls.
Looking for information on the permit process , campground information or packing lists? Refer to our Havasupai Falls Reservations and Camping Guide
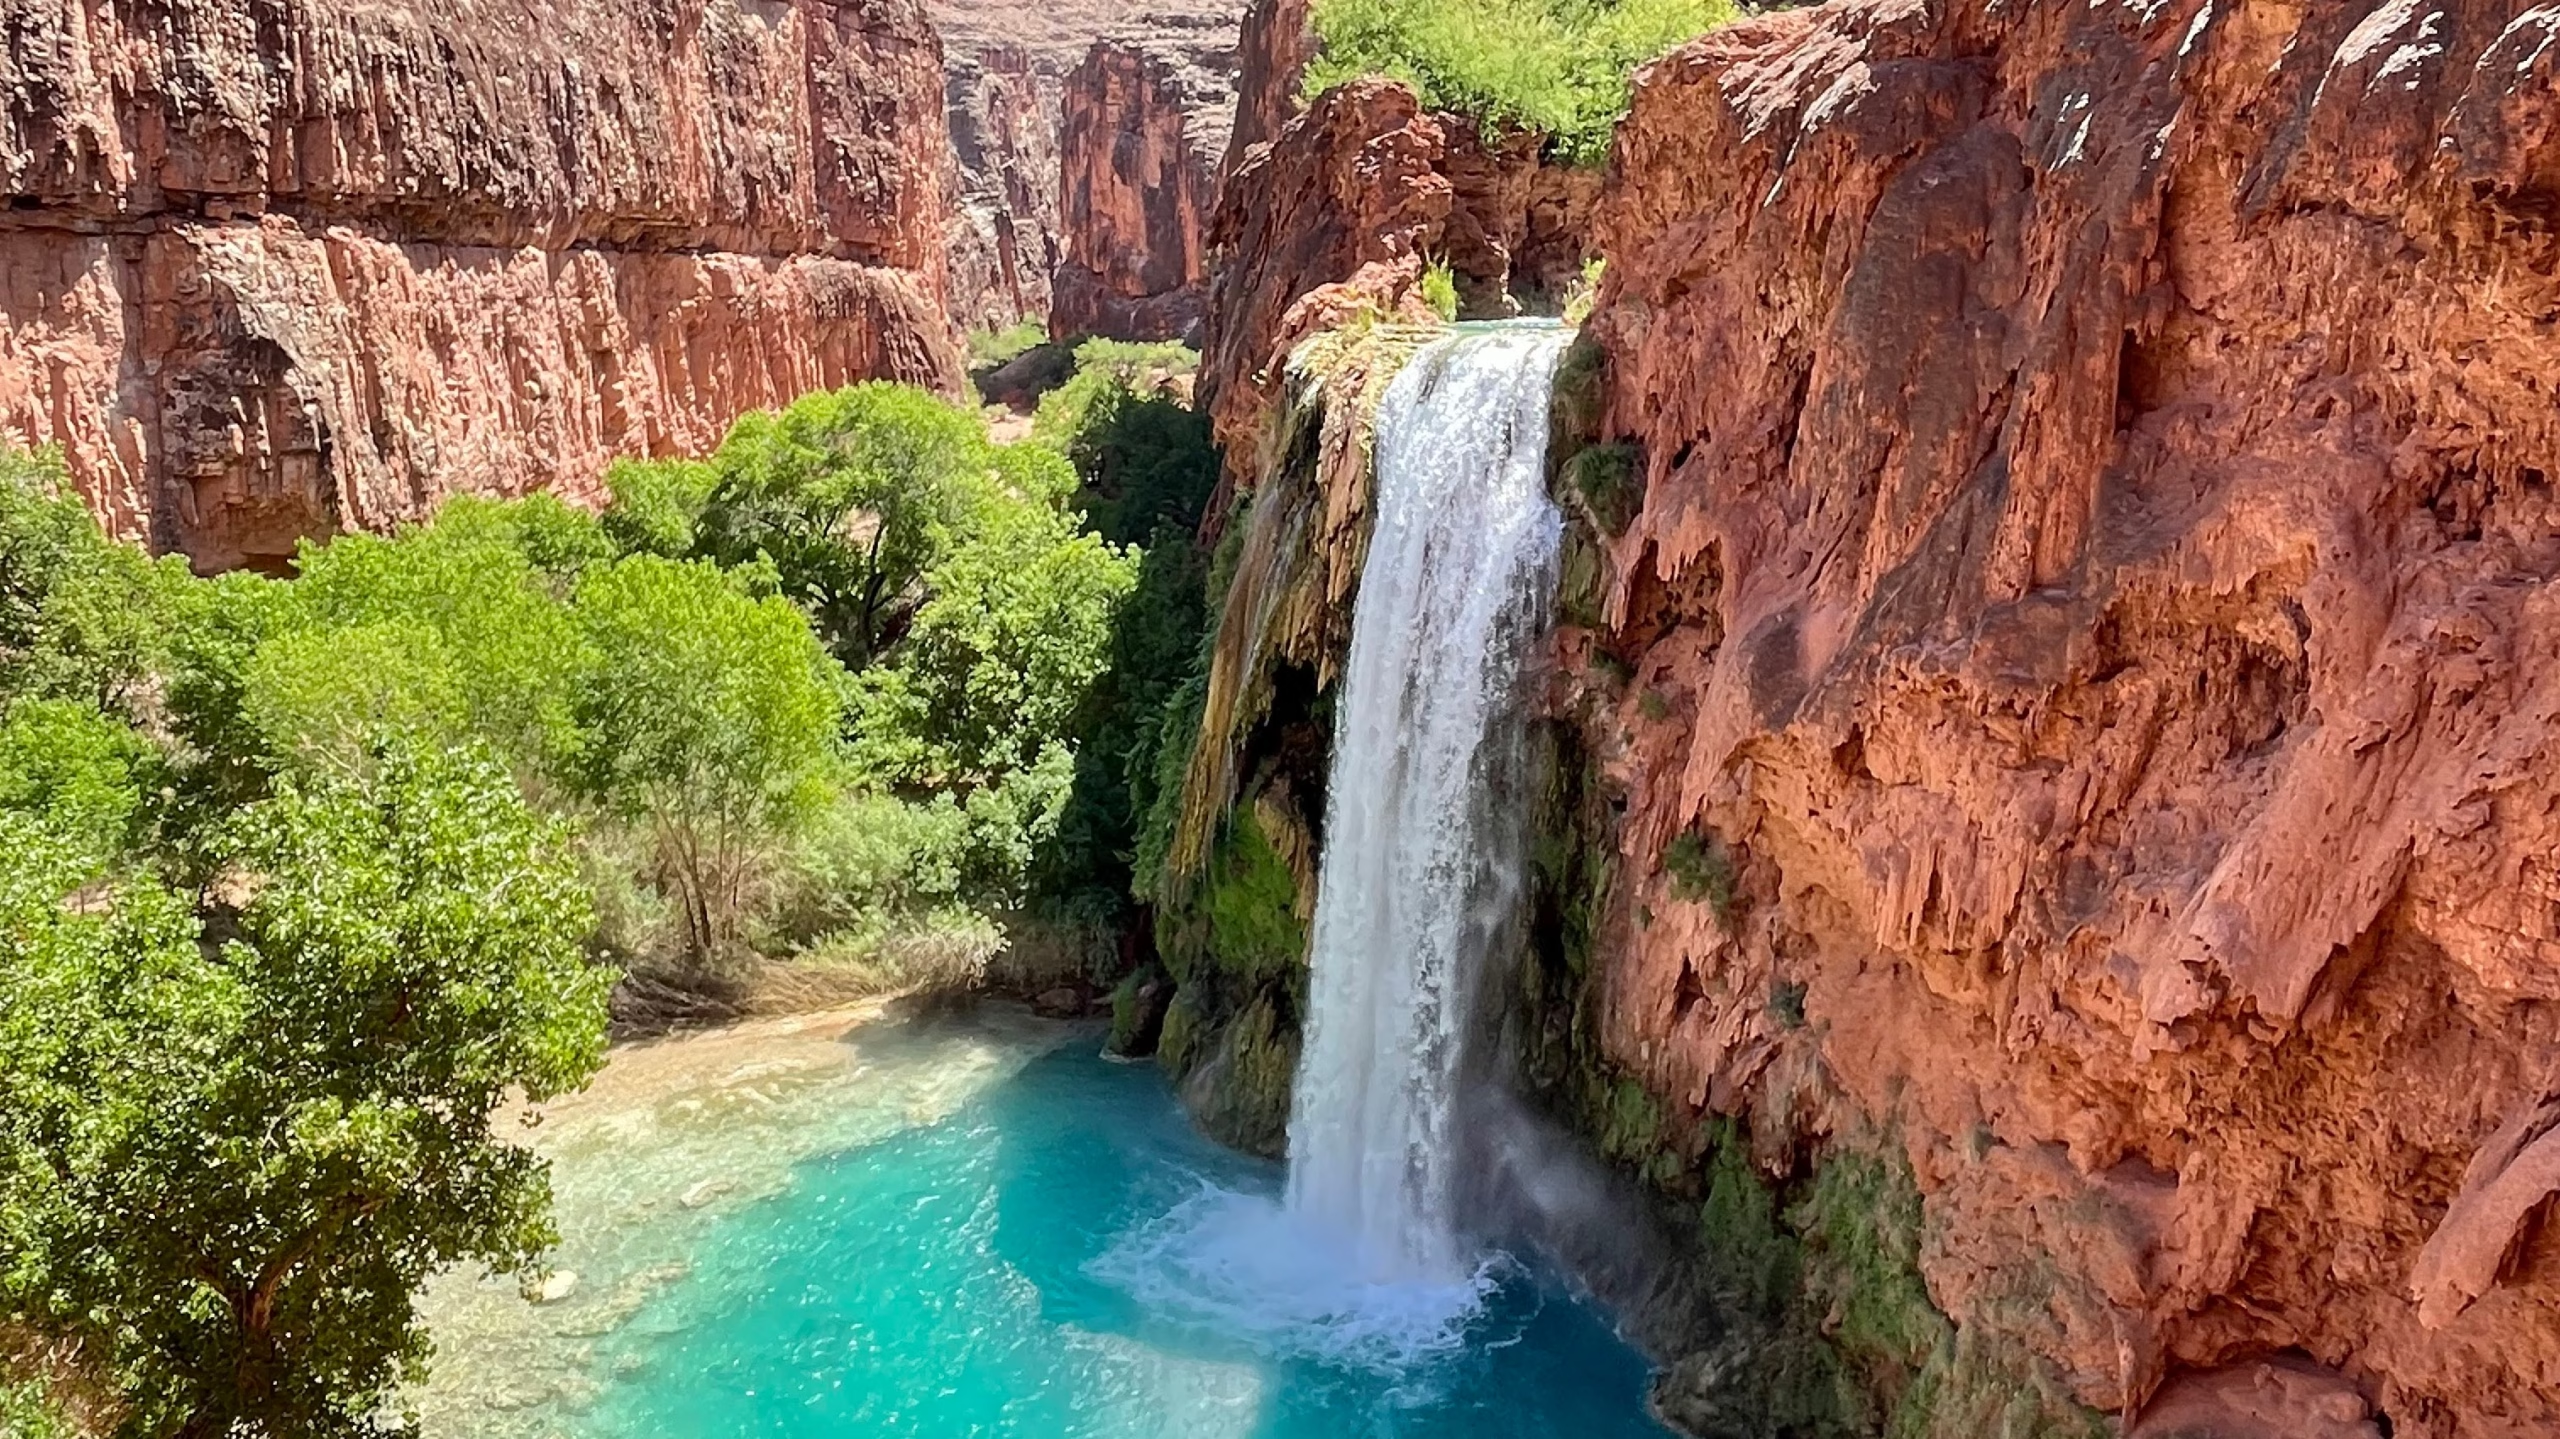
Table of Contents
Havasupai Trail at a Glance
In its entirety, the Havasupai Trail, also known as the Havasu Canyon Trail or the Supai Trail, begins on the rim Hualapai Canyon and terminates at the confluence of Havasu Creek and the Colorado River, inside the Grand Canyon. Access to the trailhead begins on Hualapai Tribal Land and the entirety of the four night trip takes place on Havasupai Land. Geologically and geographically, Havasu Canyon is one branch of the much larger Grand Canyon, but it is not land governed as part of Grand Canyon National Park.
For the majority of hikers, the Havasupai Trail refers to the 10 mile out-and-back (20 mile round trip) between the parking lot at Hualapai Hilltop Trailhead at the end of Indian Road 18 to Havasupai campground, the only designated area where overnight camping is permitted. Other than helicopter, this is the only way into the canyon and is the route that all campers and hikers with lodge reservations have to follow.
Most of the trail’s roughly 1750ft elevation gain/loss (down on the way in; up on the way out) is located within the first mile via a series of switchbacks immediately below the trailhead. From there, the trail’s gradual descent continues through the rocky wash of Hualapai Canyon. At 6 miles in, Hualapai Canyon intersects with the lower end of Cataract/Havasu Canyon, and the trail turns sandy for the remaining mileage, passing through Supai village and making one final decline past Havasu Falls before entering the campground.
6 miles – Junction of Hualapai Canyon and Havasu Canyon
8 miles – Town of Supai
9.5 miles – Havasu Falls
10 miles – Havasu Campground
10.5 miles – Mooney Falls
13.5 miles – Beaver Falls
17 miles – Confluence of the Colorado River
Recommended 3 night/4 day Havasupai itinerary
The majority of campers hike down to Havasupai with one primary goal: to marvel at the majestic waterfalls tumbling down the red cliffs of Havasu Canyon and to swim in the travertine pools of blue-green water formed by Havasu Creek. This itinerary put those objectives front and center, balancing the amount of time spent hiking with the amount of time devoting to lounging around and soaking in the sights and atmosphere of the canyon oasis.
| Day | Suggested Itinerary |
|---|---|
| Day 1 | Hike Hilltop to Havsupai Campground Visit Havasu Falls |
| Day 2 | Hike to Mooney Falls and Beaver Falls* |
| Day 3 | Visit Supai Village and upstream waterfalls |
| Day 4 | Pack up Hike back to Hilltop Trailhead |
*Avid hikers may want to continue to the Confluence of the Colorado, rather than stopping their hike at Beaver Falls. This part of the canyon is remote and includes stretches of trail that are not clearly marked. Help is not readily available for hikers who become lost, tired, overheated or dehydrated. This hike should only be attempted by those in good shape with proper preparation and experience. Anticipate a full day of hiking and bring a water filter and navigation device (like a Garmin) that can receive Grand Canyon River Alerts.
Day 1 Recommended Itinerary: Hiking into Havasupai
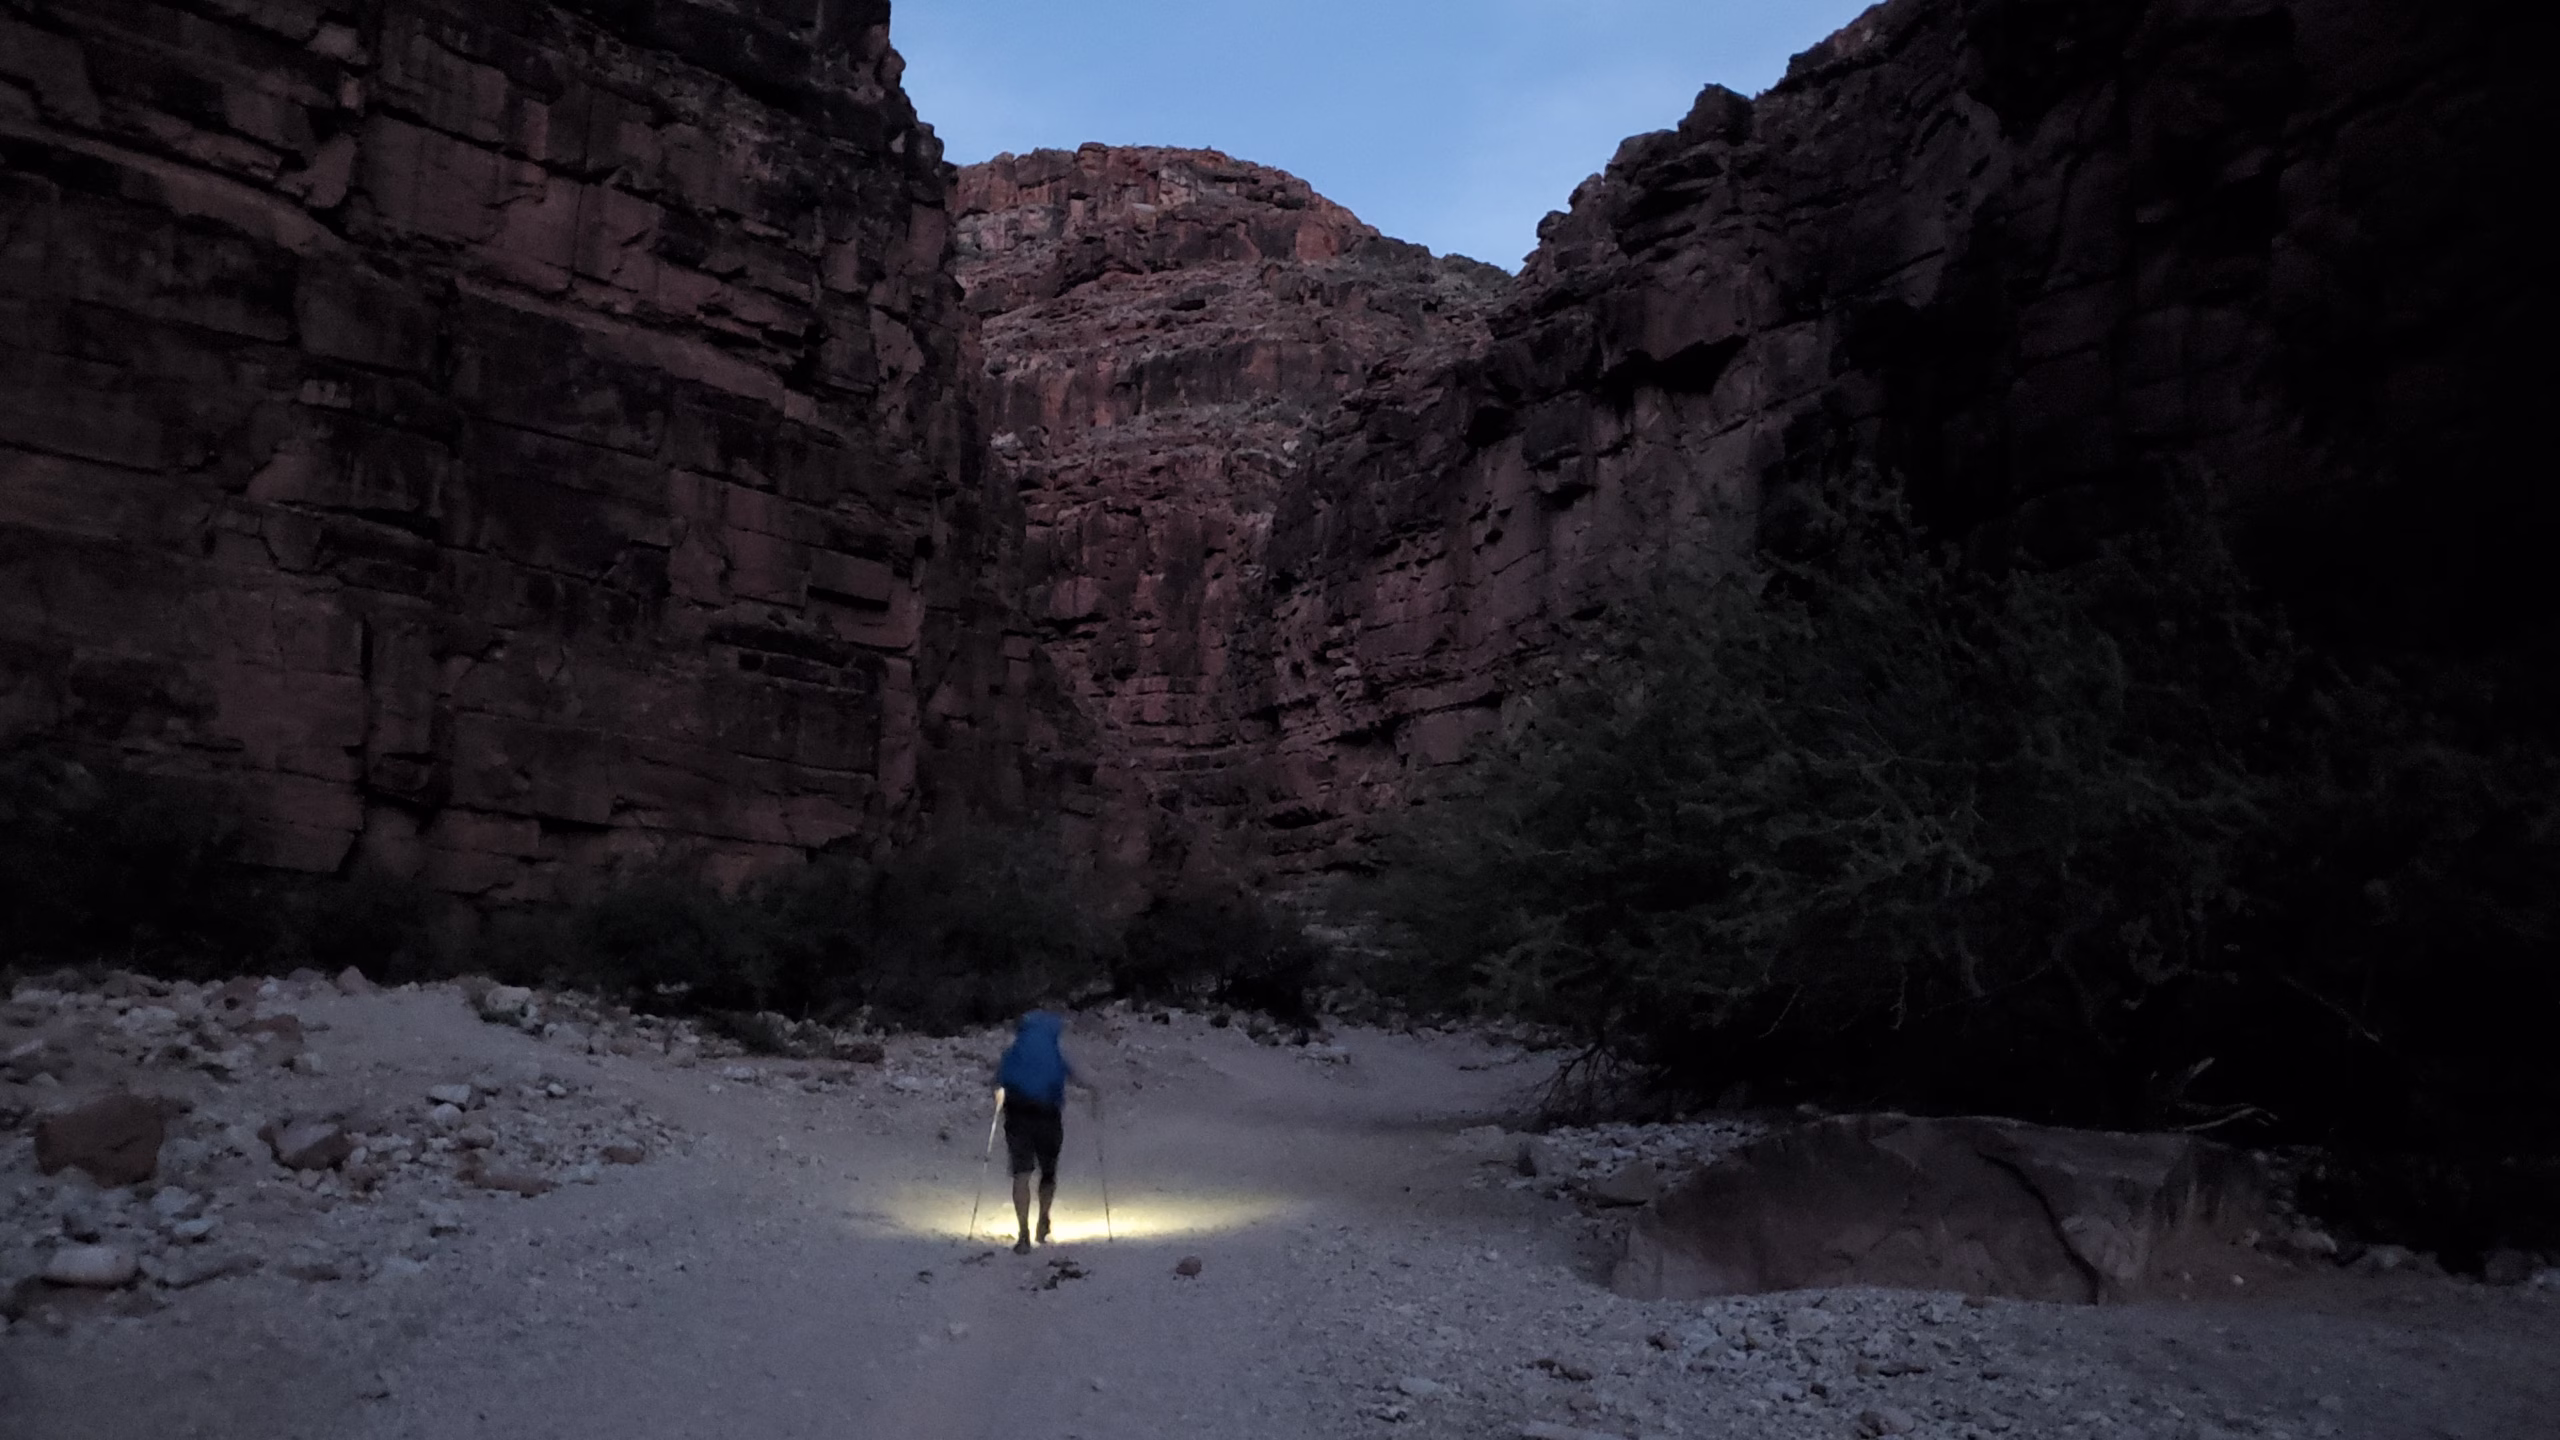
On day one, you’ll need to arrive at the trailhead, hike approximately 10 miles into the canyon to the Havasupai campground and set up your camp. There is no camping or sleeping at the trailhead, and the closest hotel, the Hualapai Lodge in Peach Springs, is over an hour’s drive. Prepare to leave no later than 4am. You’ll want to hit the trail early – before or just at sunrise, especially during the summer months – so you need to have picked up your permit the day before you begin your hike.
The trail can get very hot, very quickly. The cooler it is, the less water you need; the less water you need, the less weight you have to carry. The less weight you have to carry, the faster you can go, and the further you can hike in the cooler parts of the day, which means (that’s right!) you need less water. There are no opportunities to replenish your water supply until past the canyon junction (you can purchase water in town, 8 miles in, if you do not have a water filter). Start early. This way you’ll be able to traverse the most exposed parts of the trail while it is still in shadow of the canyon wall.
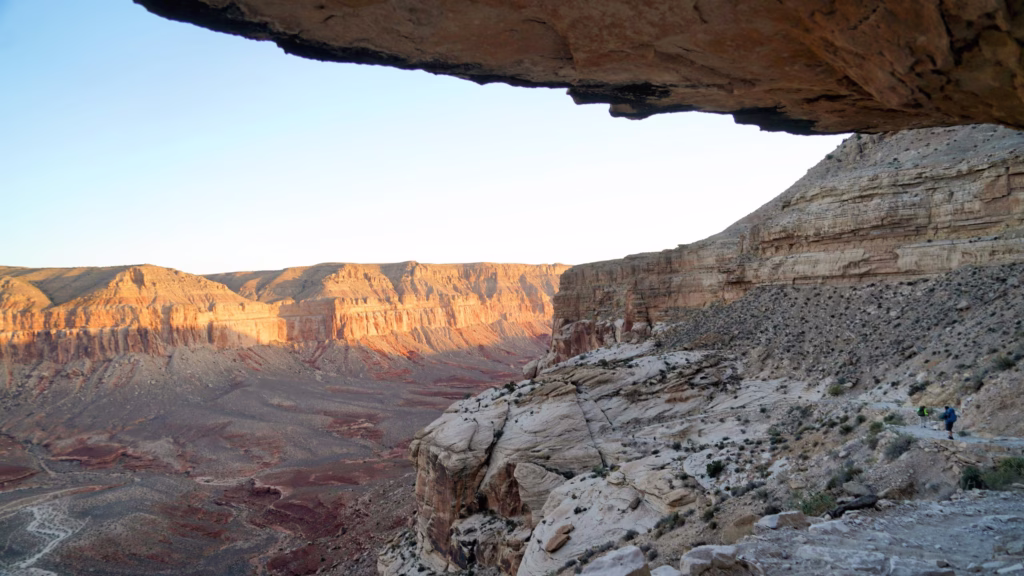
The trail begins to descend immediately beyond the trailhead through a band of white Cocoino Sandstone. From there it turns sharply into a natural break in the rocks via a series of winding switchbacks, totaling roughly 1000ft of elevation loss within the span of the first mile and a half.
Although the elevation continues to drop throughout the entire 10 mile hike to the campground, this is the steepest portion of the trail by a margin.
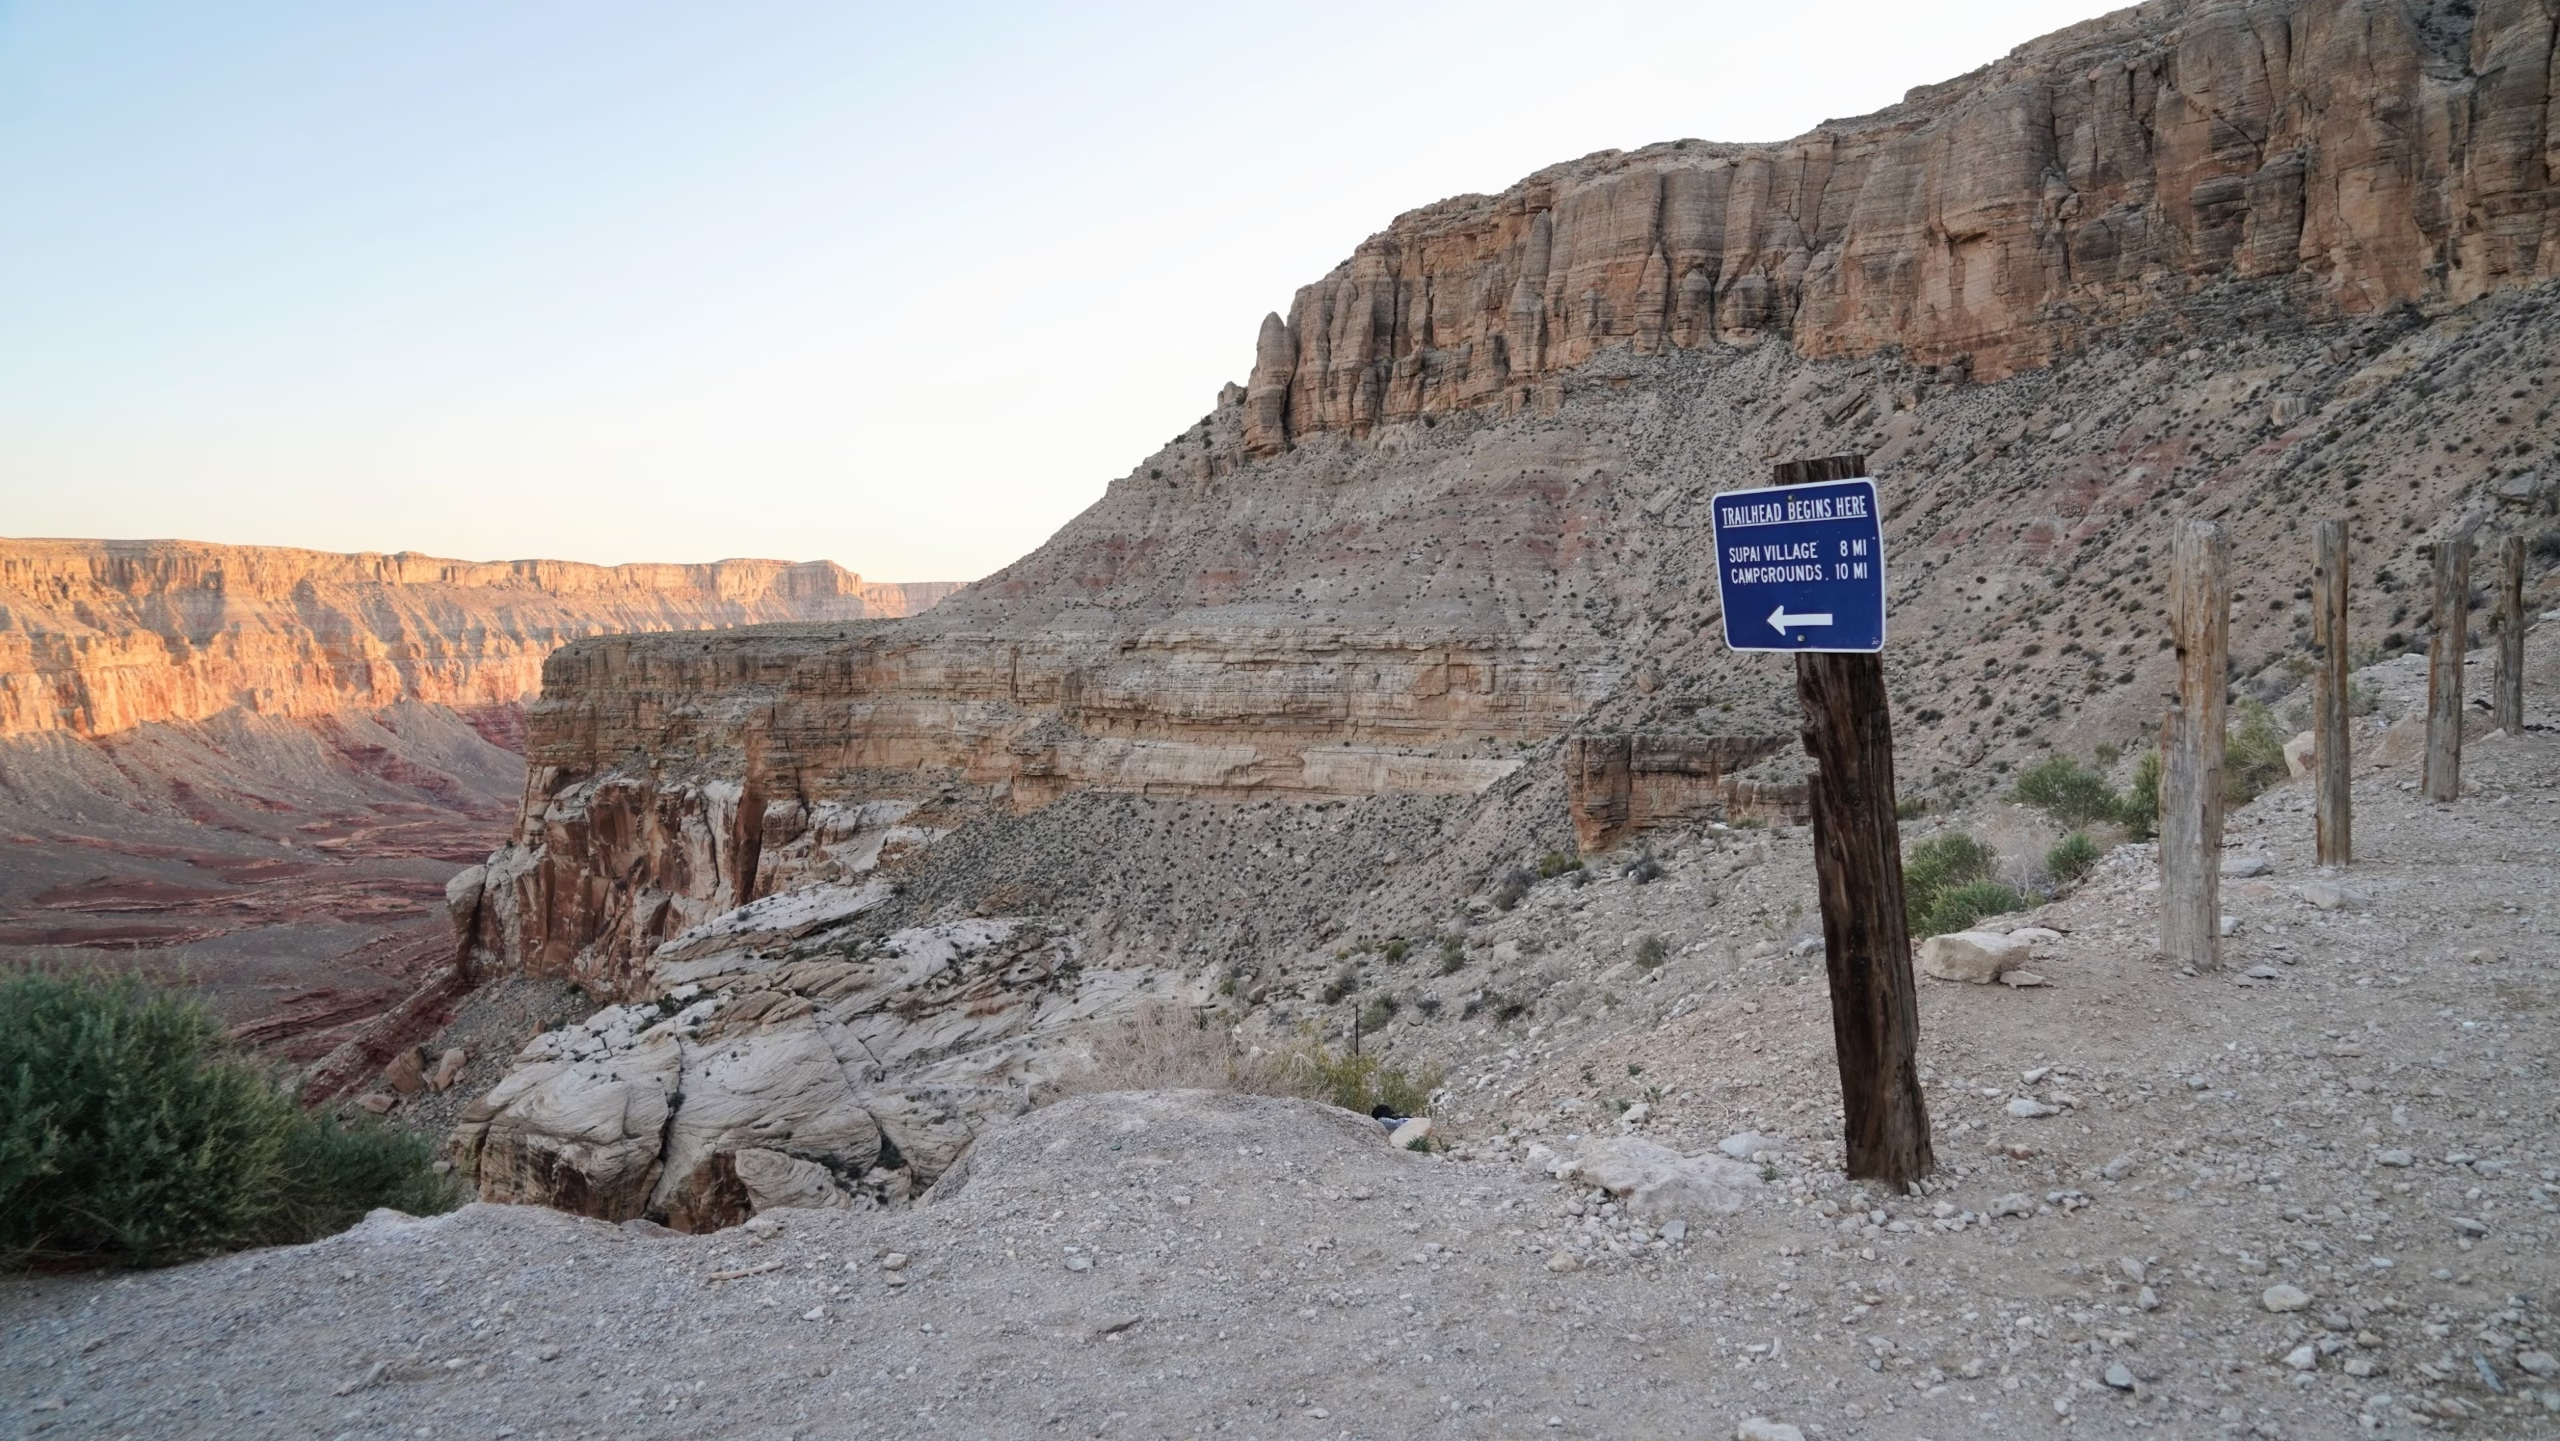
Havasu Creek Trailhead 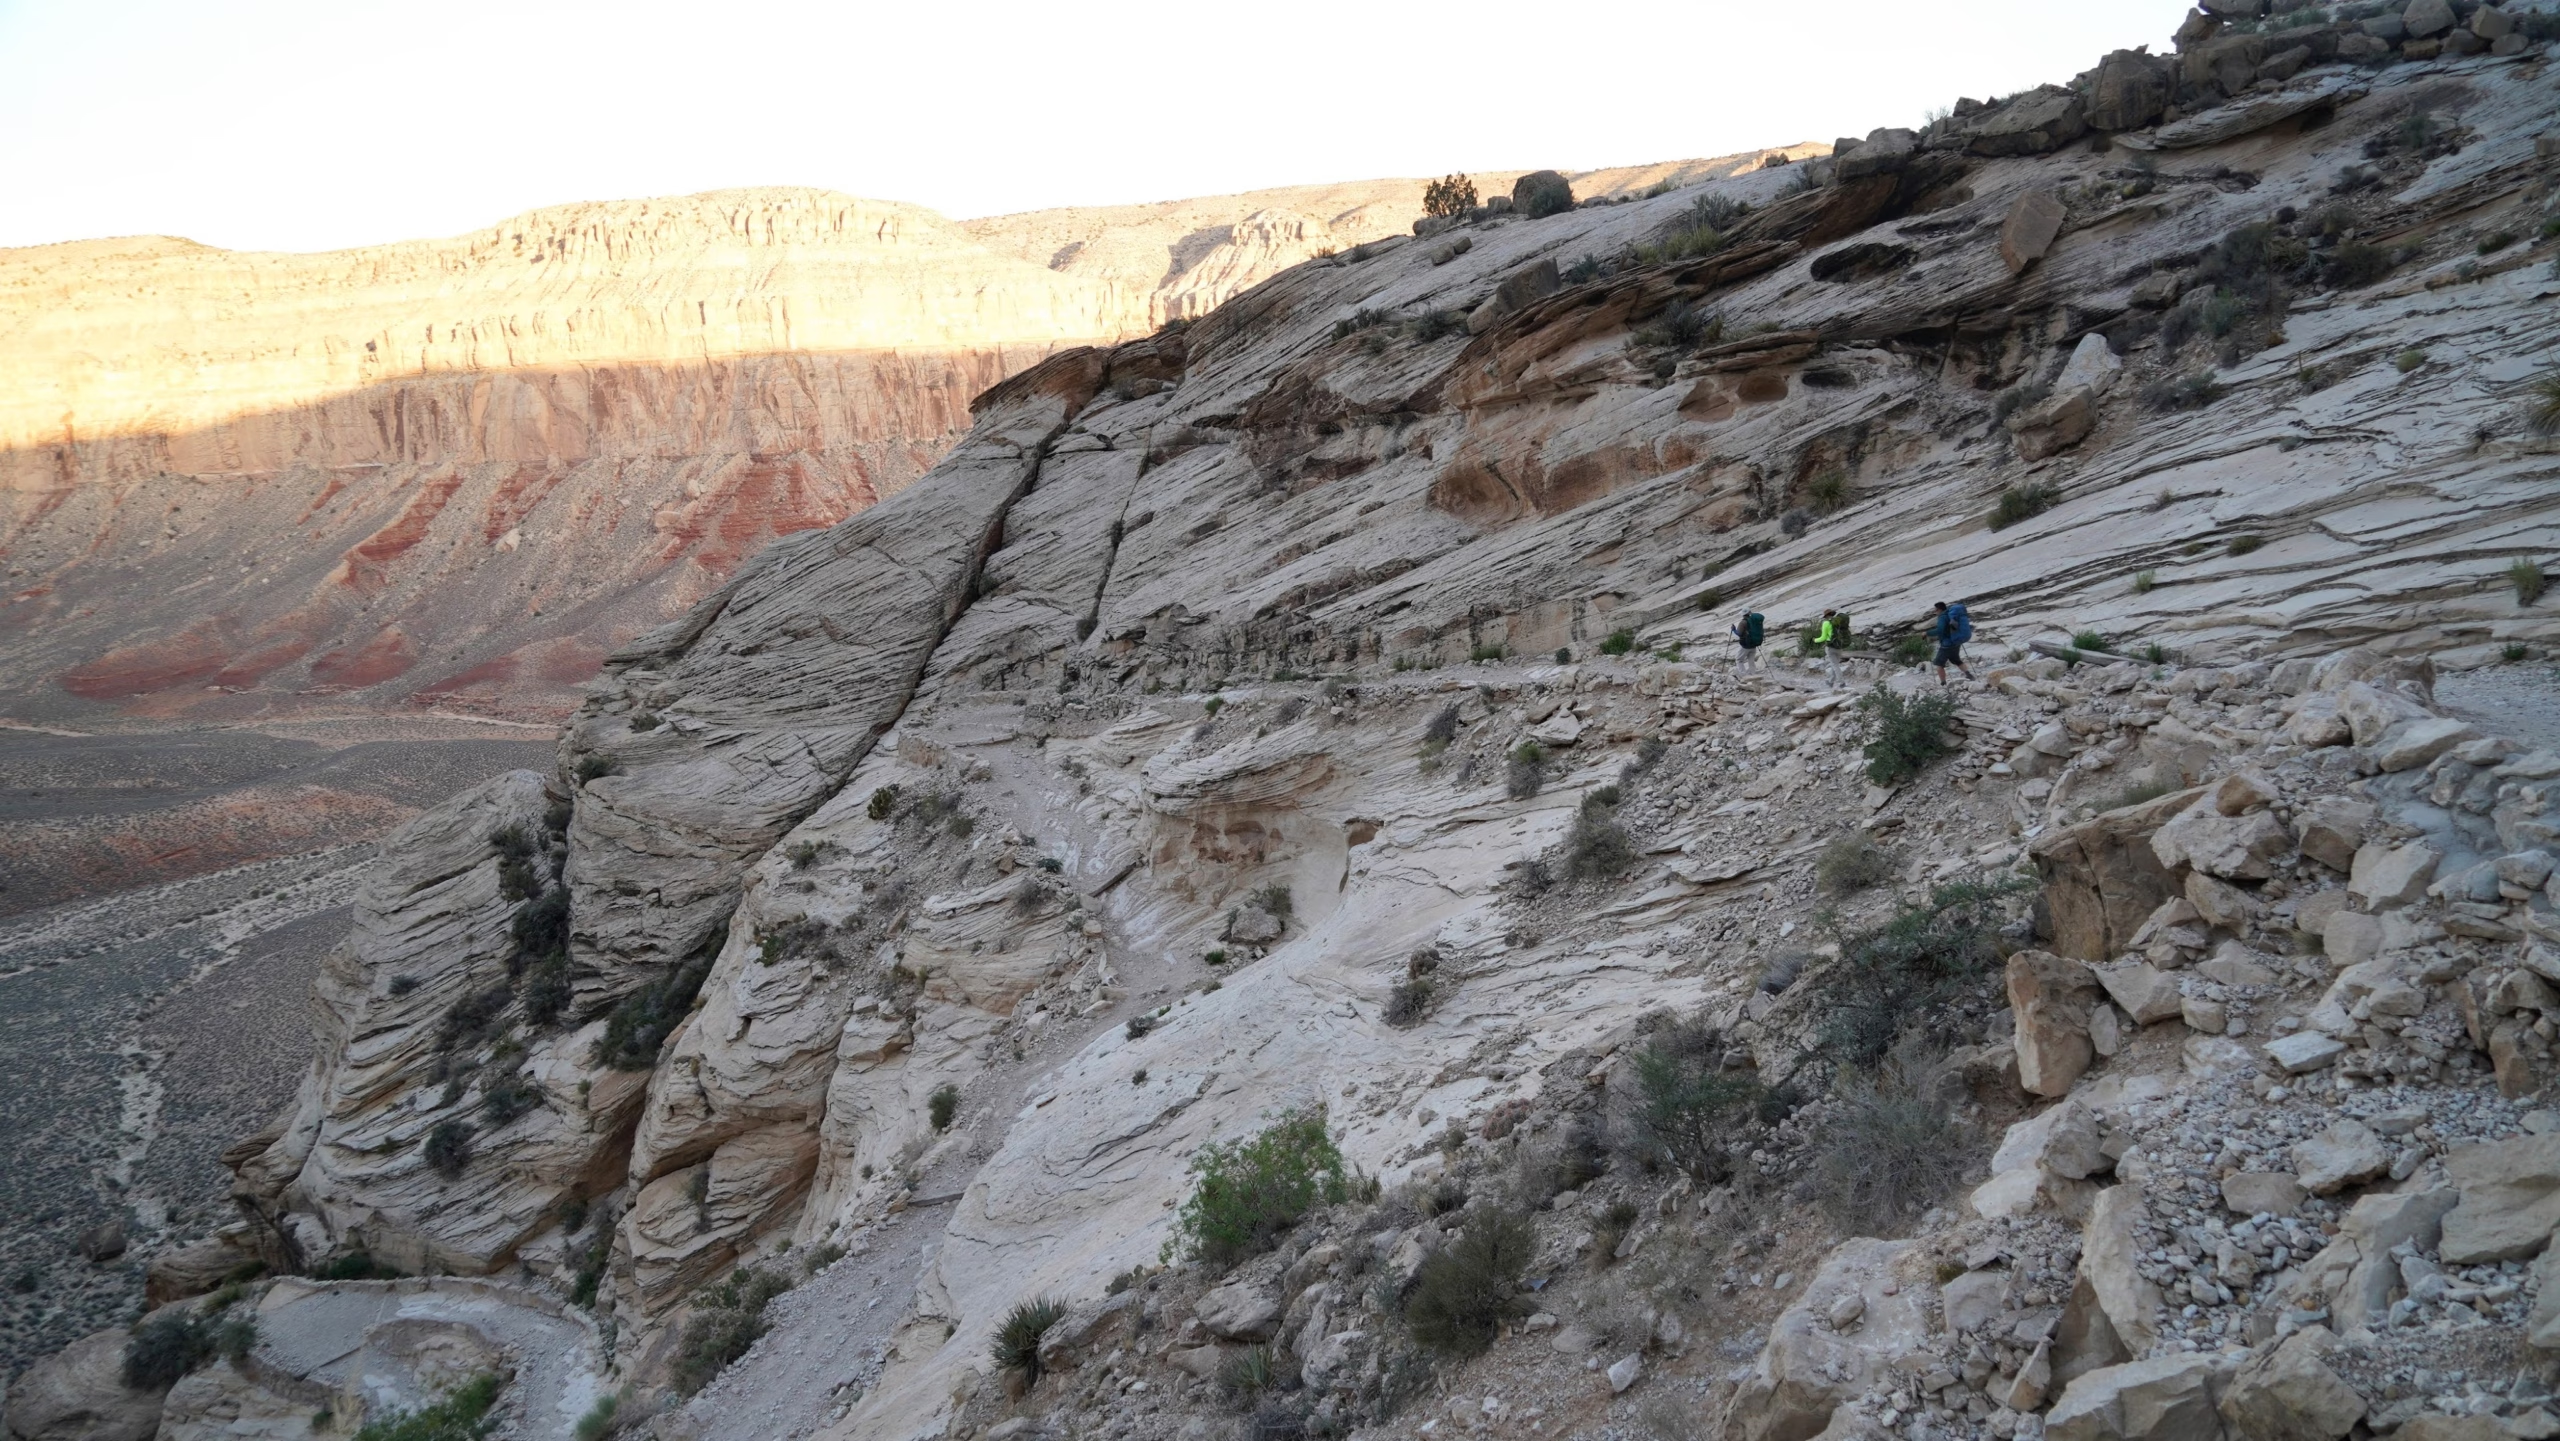
Three hikers walk along the white rocks of the Havaupai Trail as the sun illuminates canyon walls in the distance. 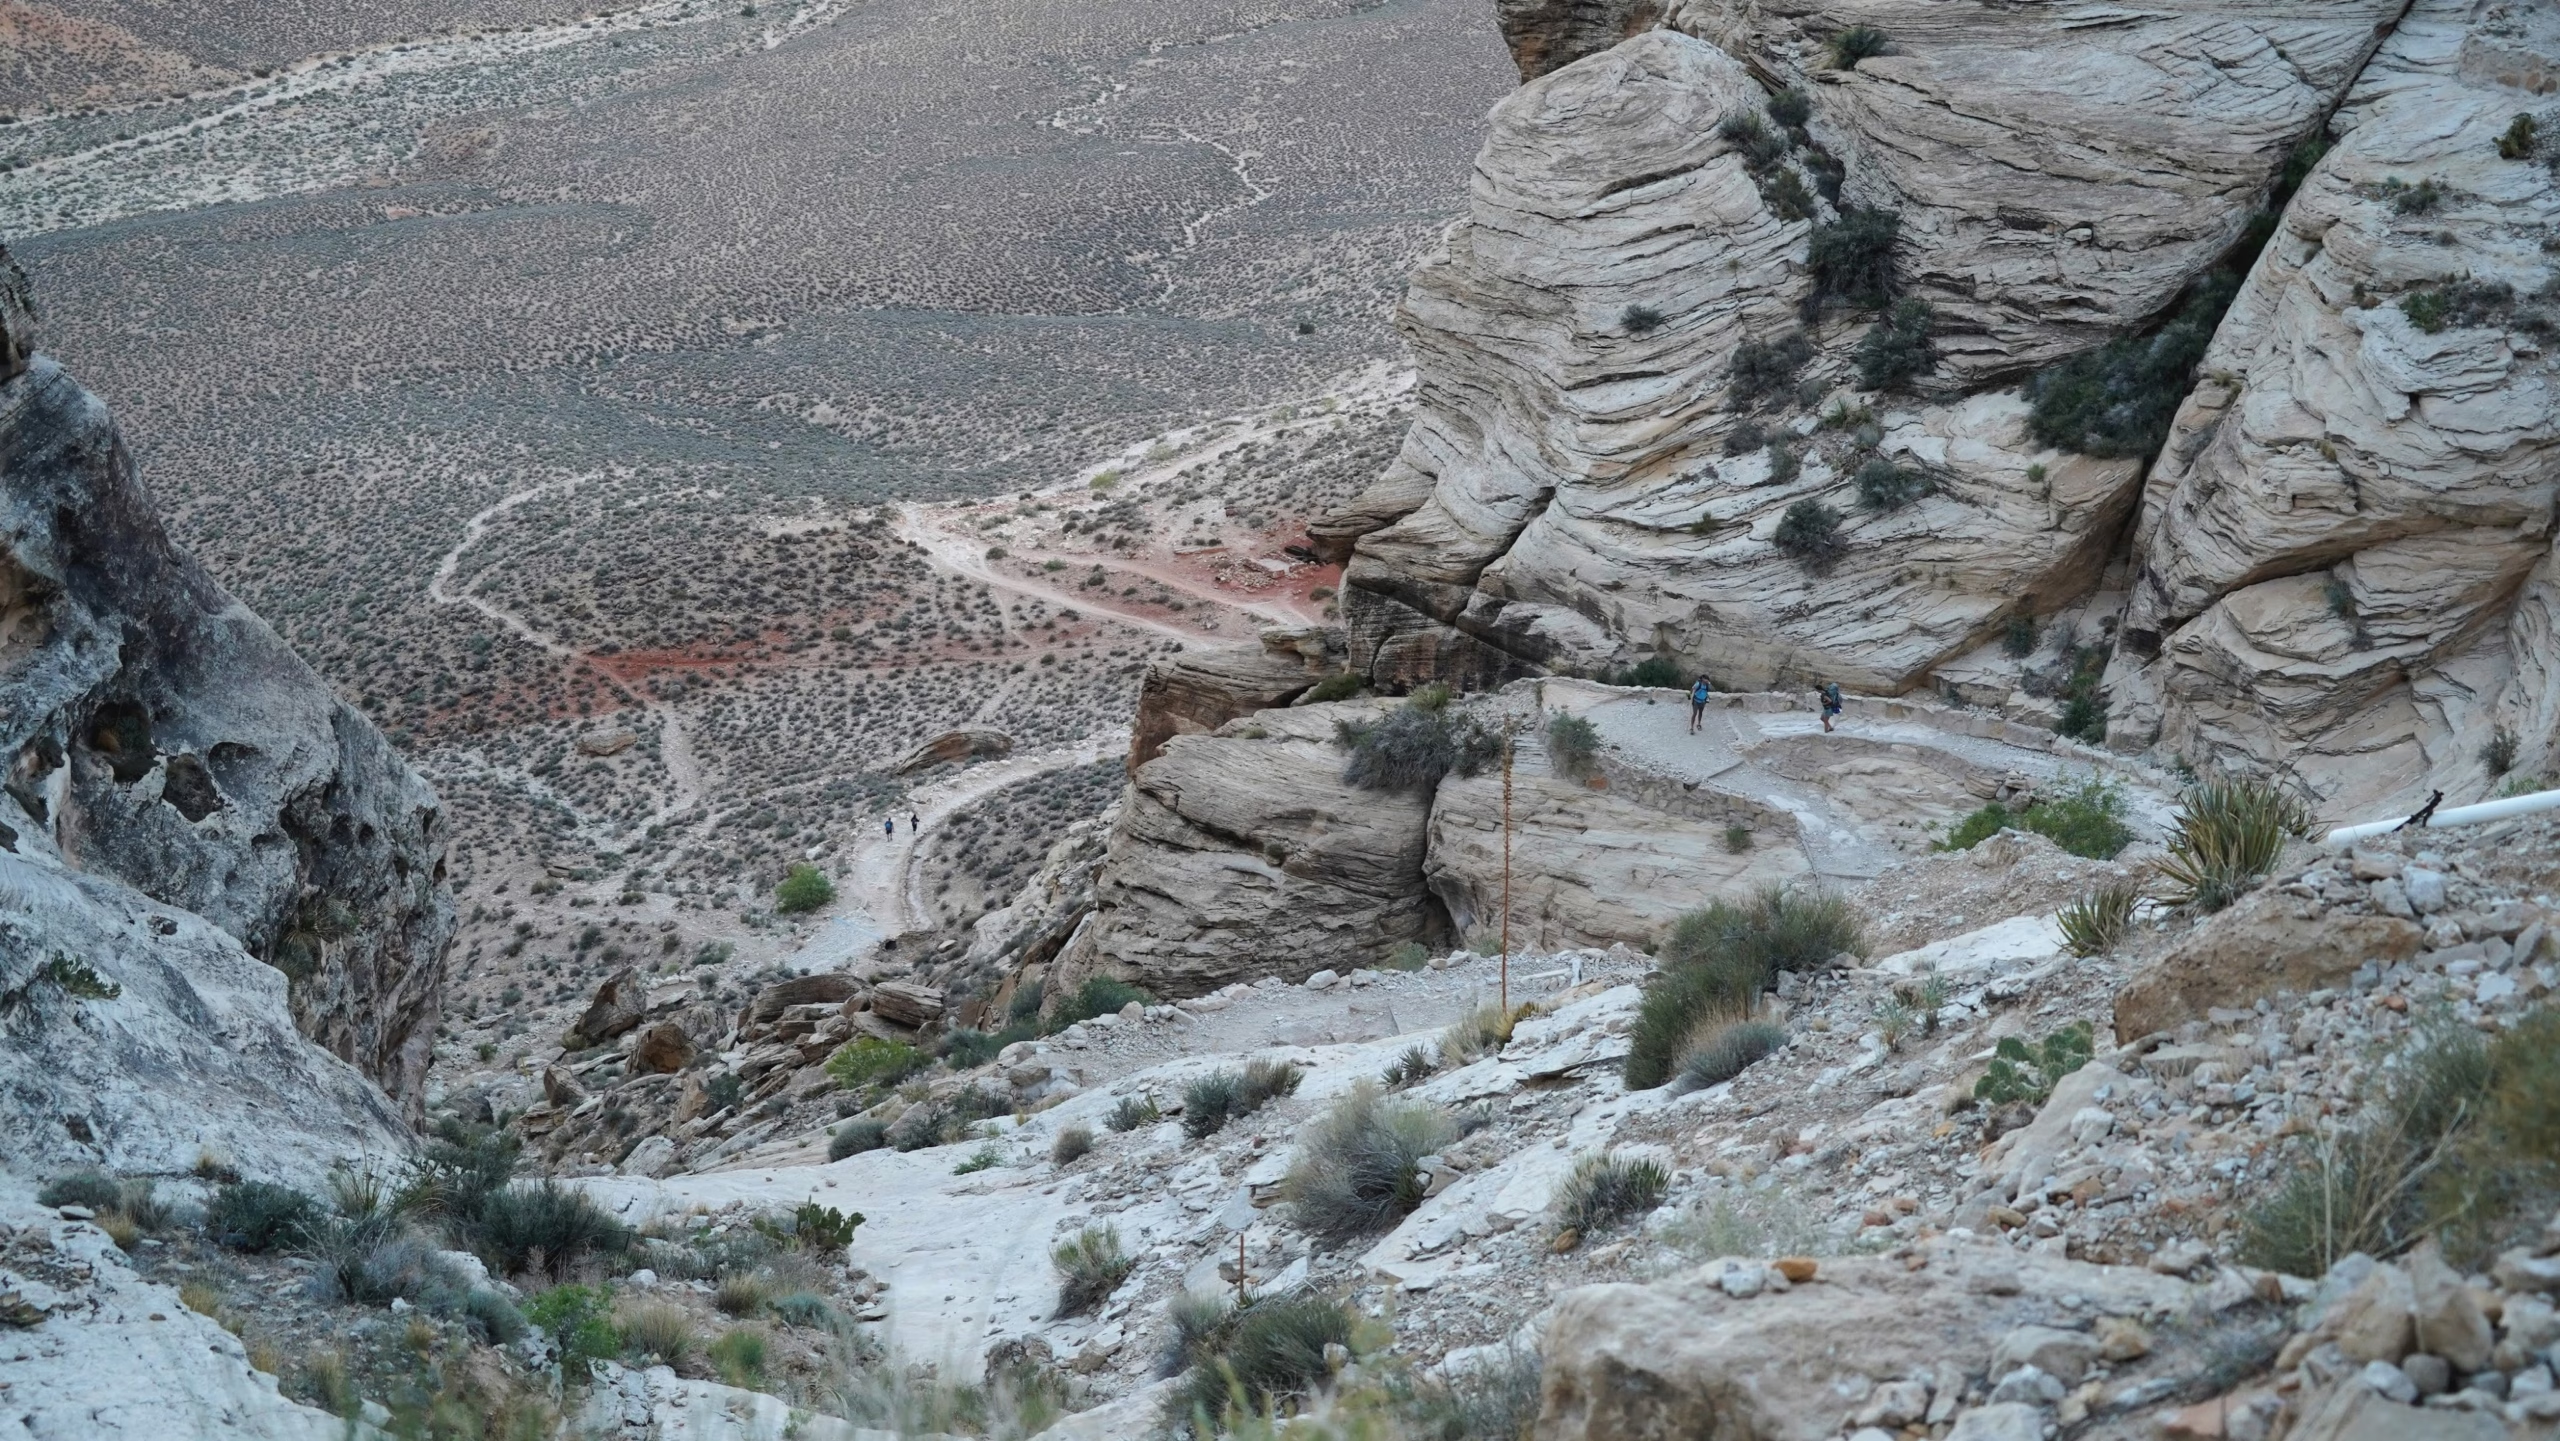
Hikers seen on the numerous tiers of switchbacks leading down to the Hulapai Canyon floor 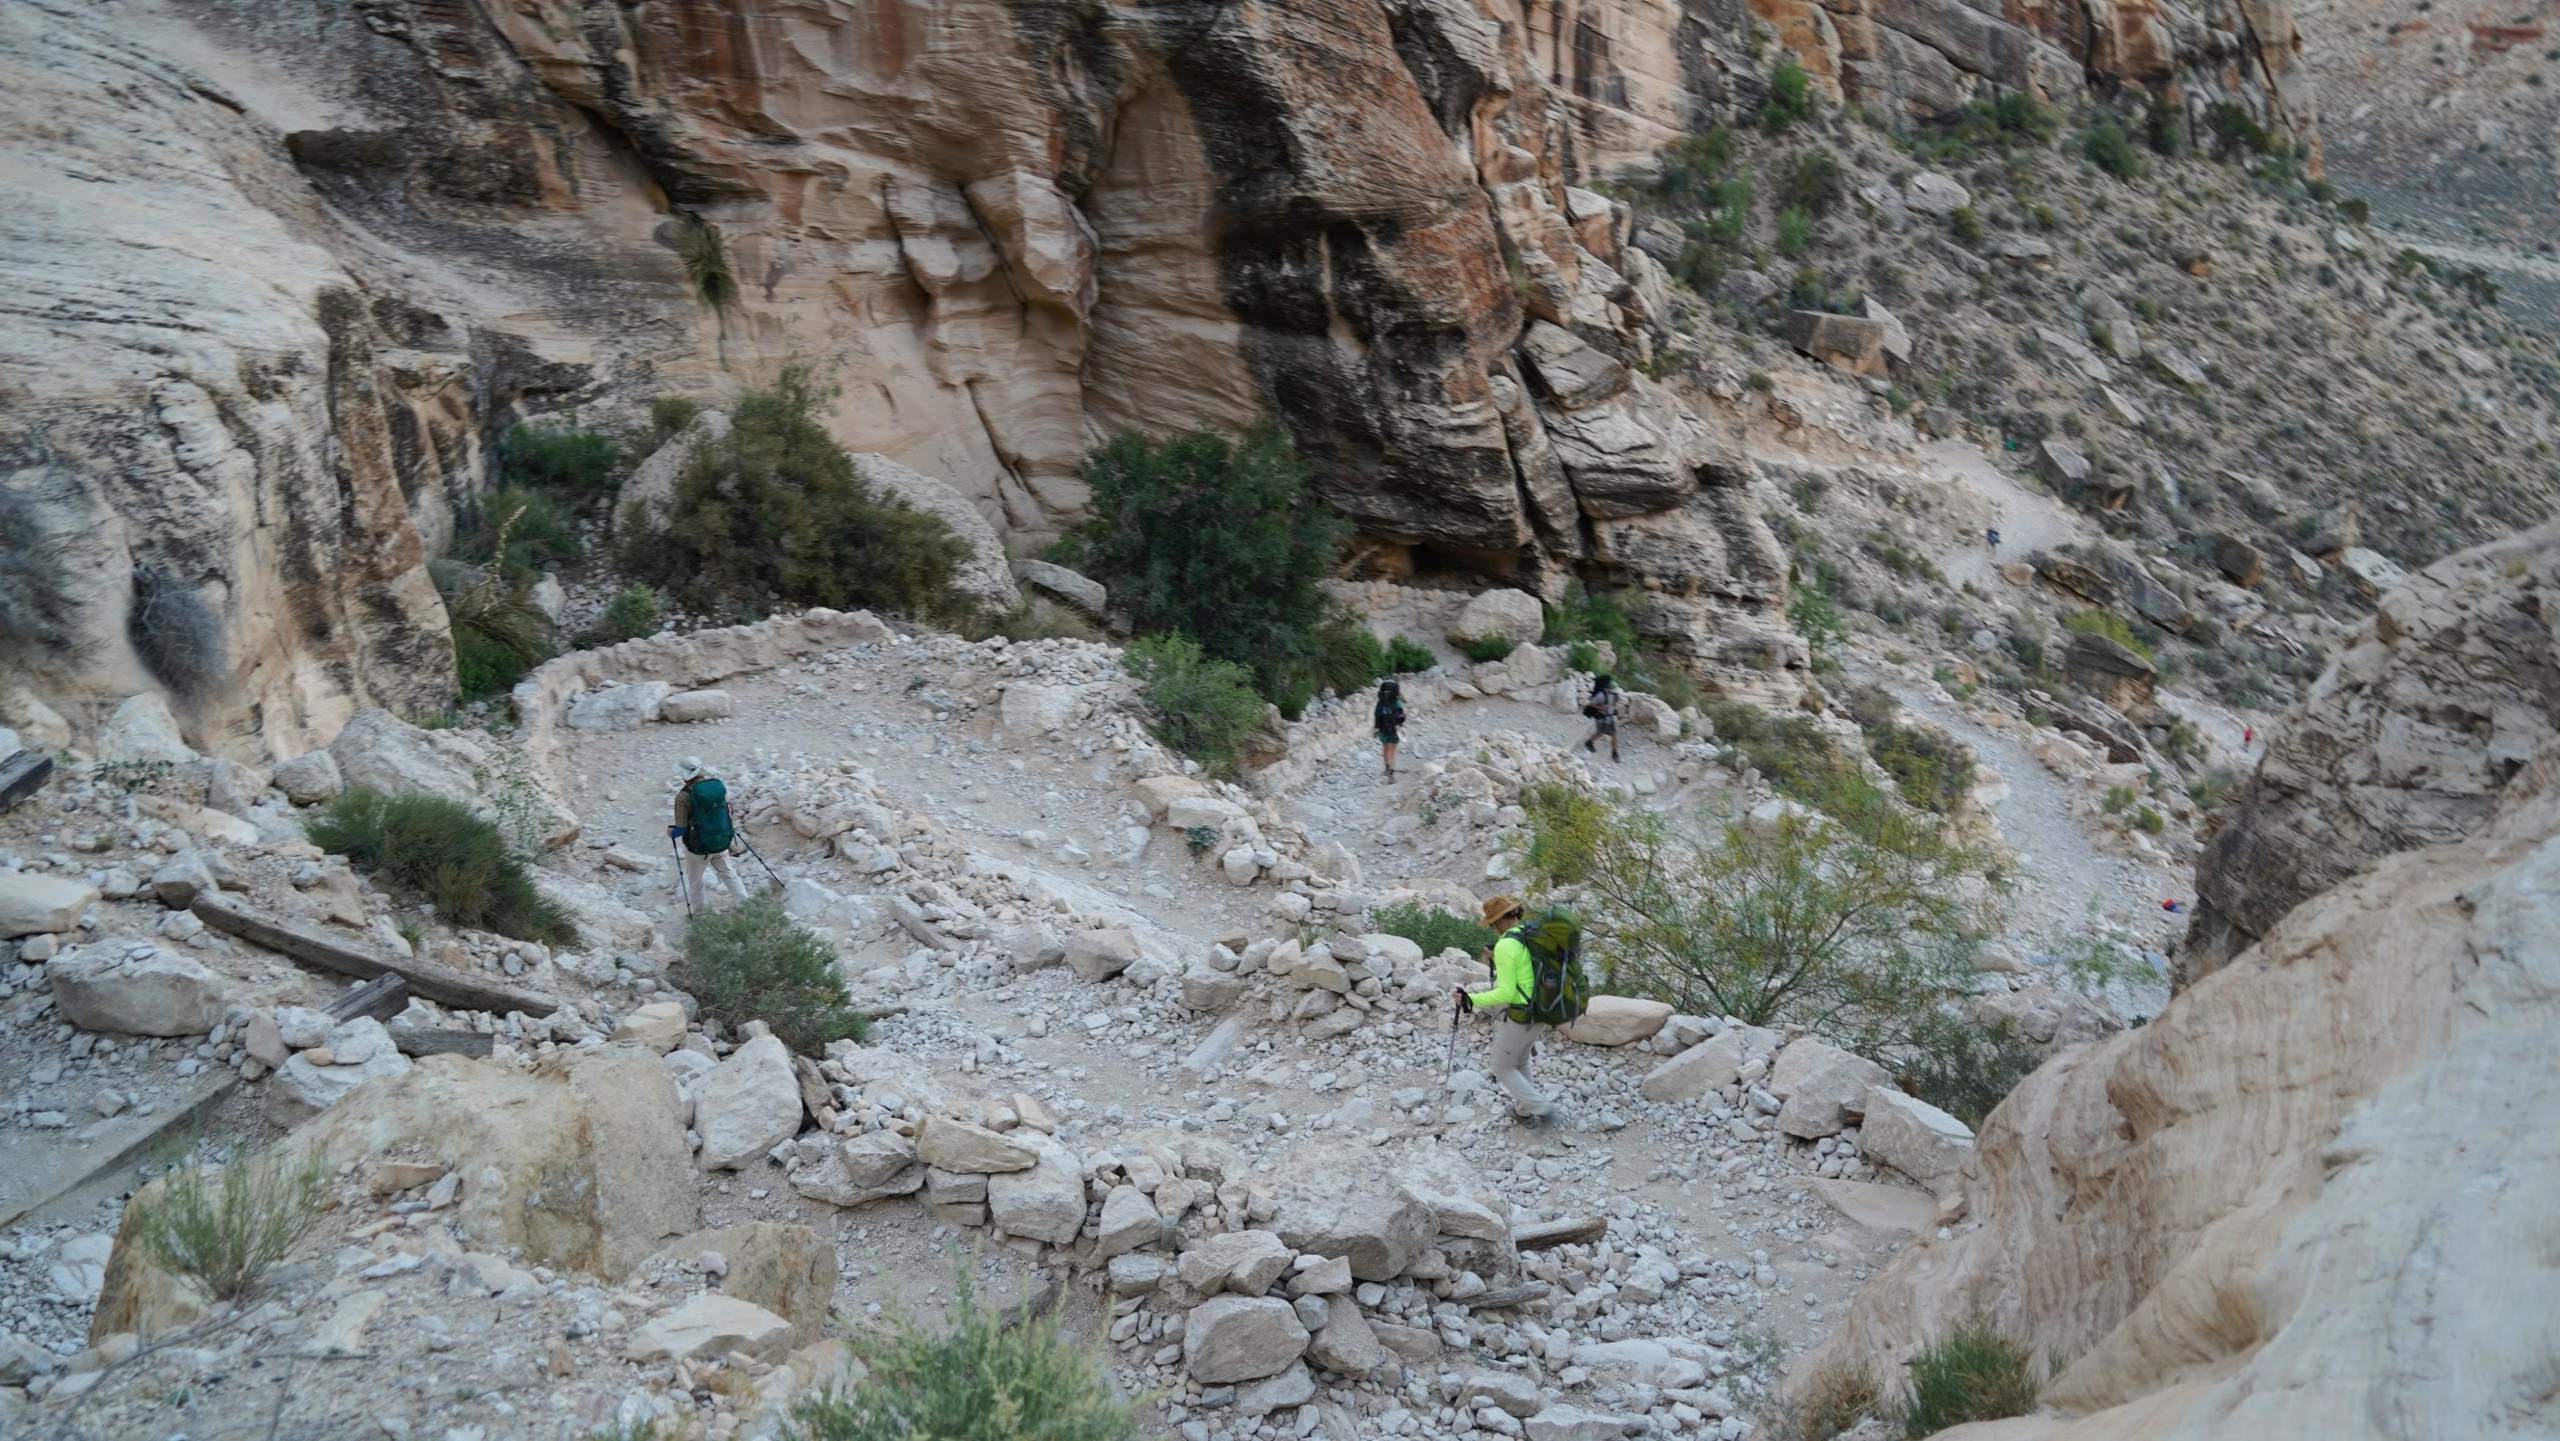
Hikers descend several tiers of switchbacks leading down to the Hulapai Canyon floor 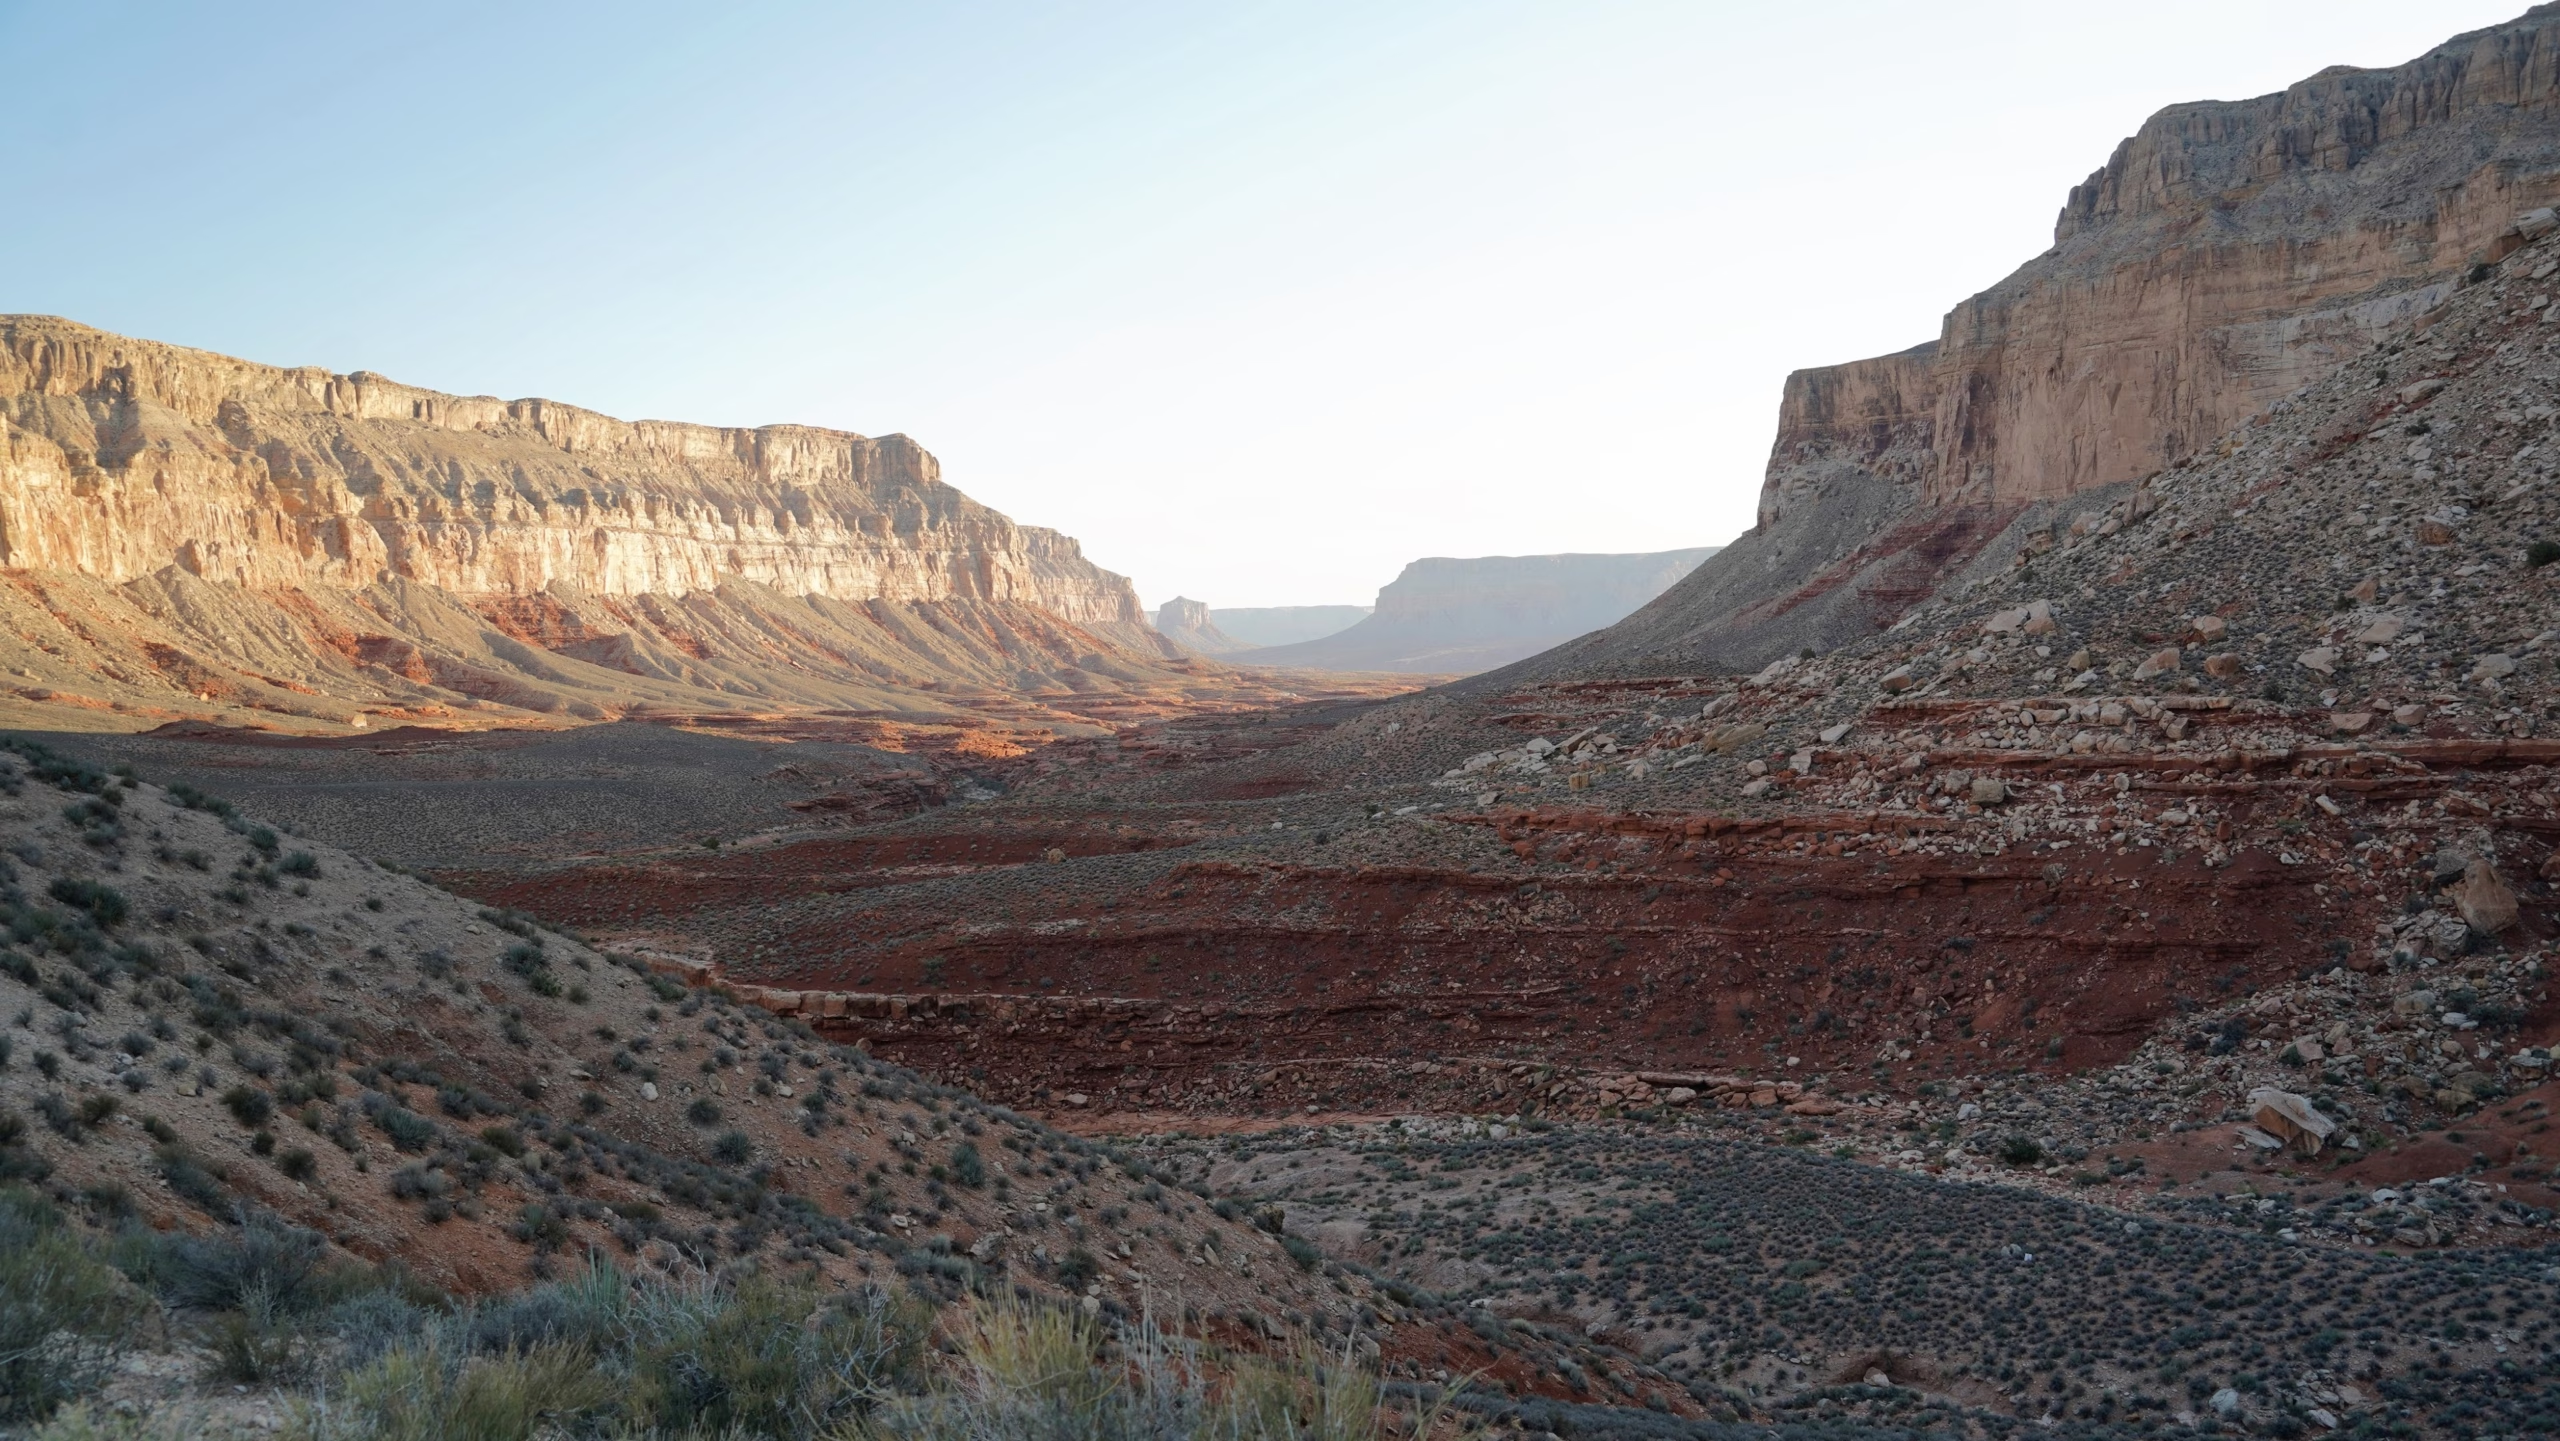
Looking down the length of Hualapai Canyon, flanked on both sides with sheer cliffs.
The trail widens near the base of the switchbacks and cuts across an open expanse of desert scrubland, situated along the visible bench of Esplanade sandstone comprising the interior of the greater Grand Canyon.
The trail then takes a sharp right hand turn, connecting to a well worn footpath through the rocky gravel of a dry wash that leads you deeper into Hualapai canyon.
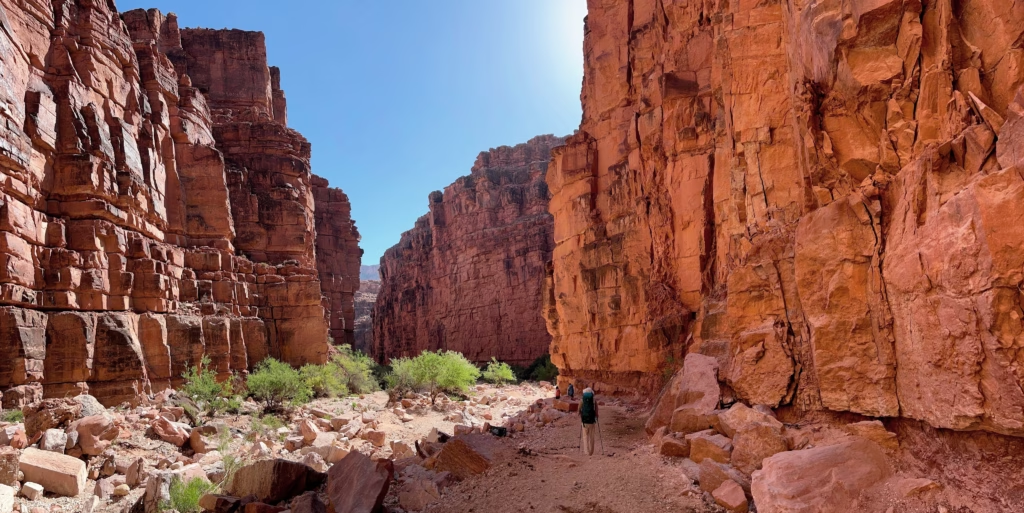
Hiking through Hualapai Canyon

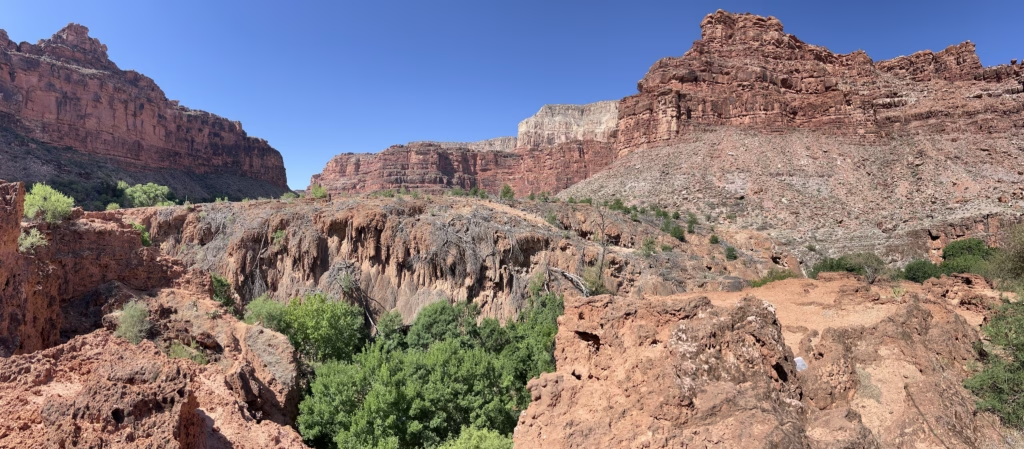
The walls redden as you enter the canyon, indicative of the fact that you’ve passed into a new geologic layer. The Havasupai Trail periodically splits and rejoins as it weaves between the canyon walls. All paths will eventually lead back to a primary trail, so it doesn’t matter which one you take; one often goes high, closer to the rocks, while another remains lower in the wash. The trail will remain largely shaded, protected from the rising sun until later in the day.
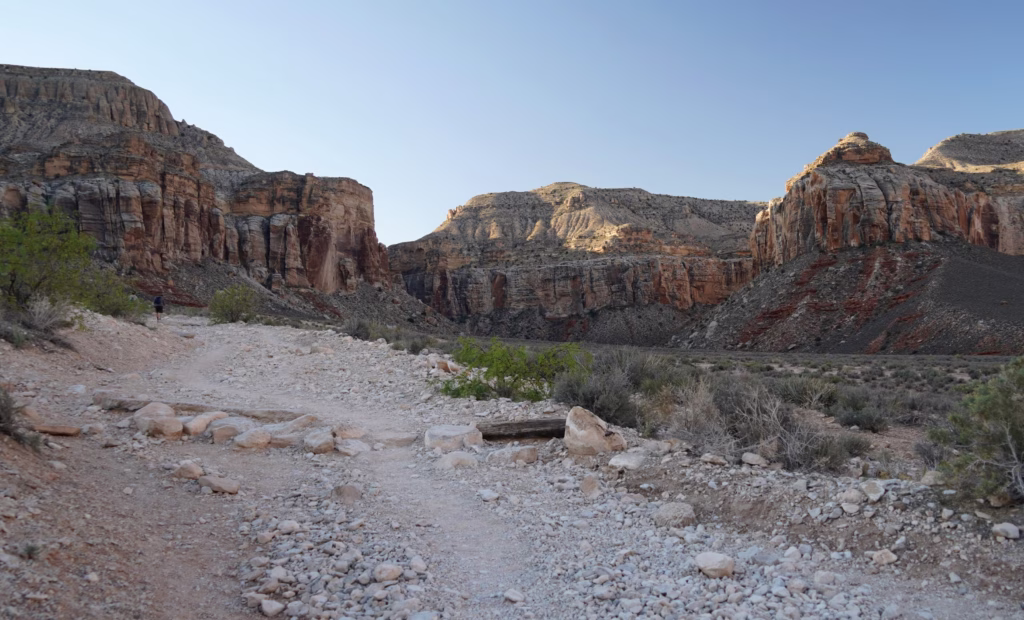
As the canyon narrows you lose sight of the original canyon rim, and the deeper you press, the easier it is to lose all sense of scale. The canyon once viewed from the trailhead now becomes rock walls flanking both sides of the trail. This is perhaps the most interesting portion of the hike, passing through numerous sandstone formations carved into the rock by water, wind, and time.


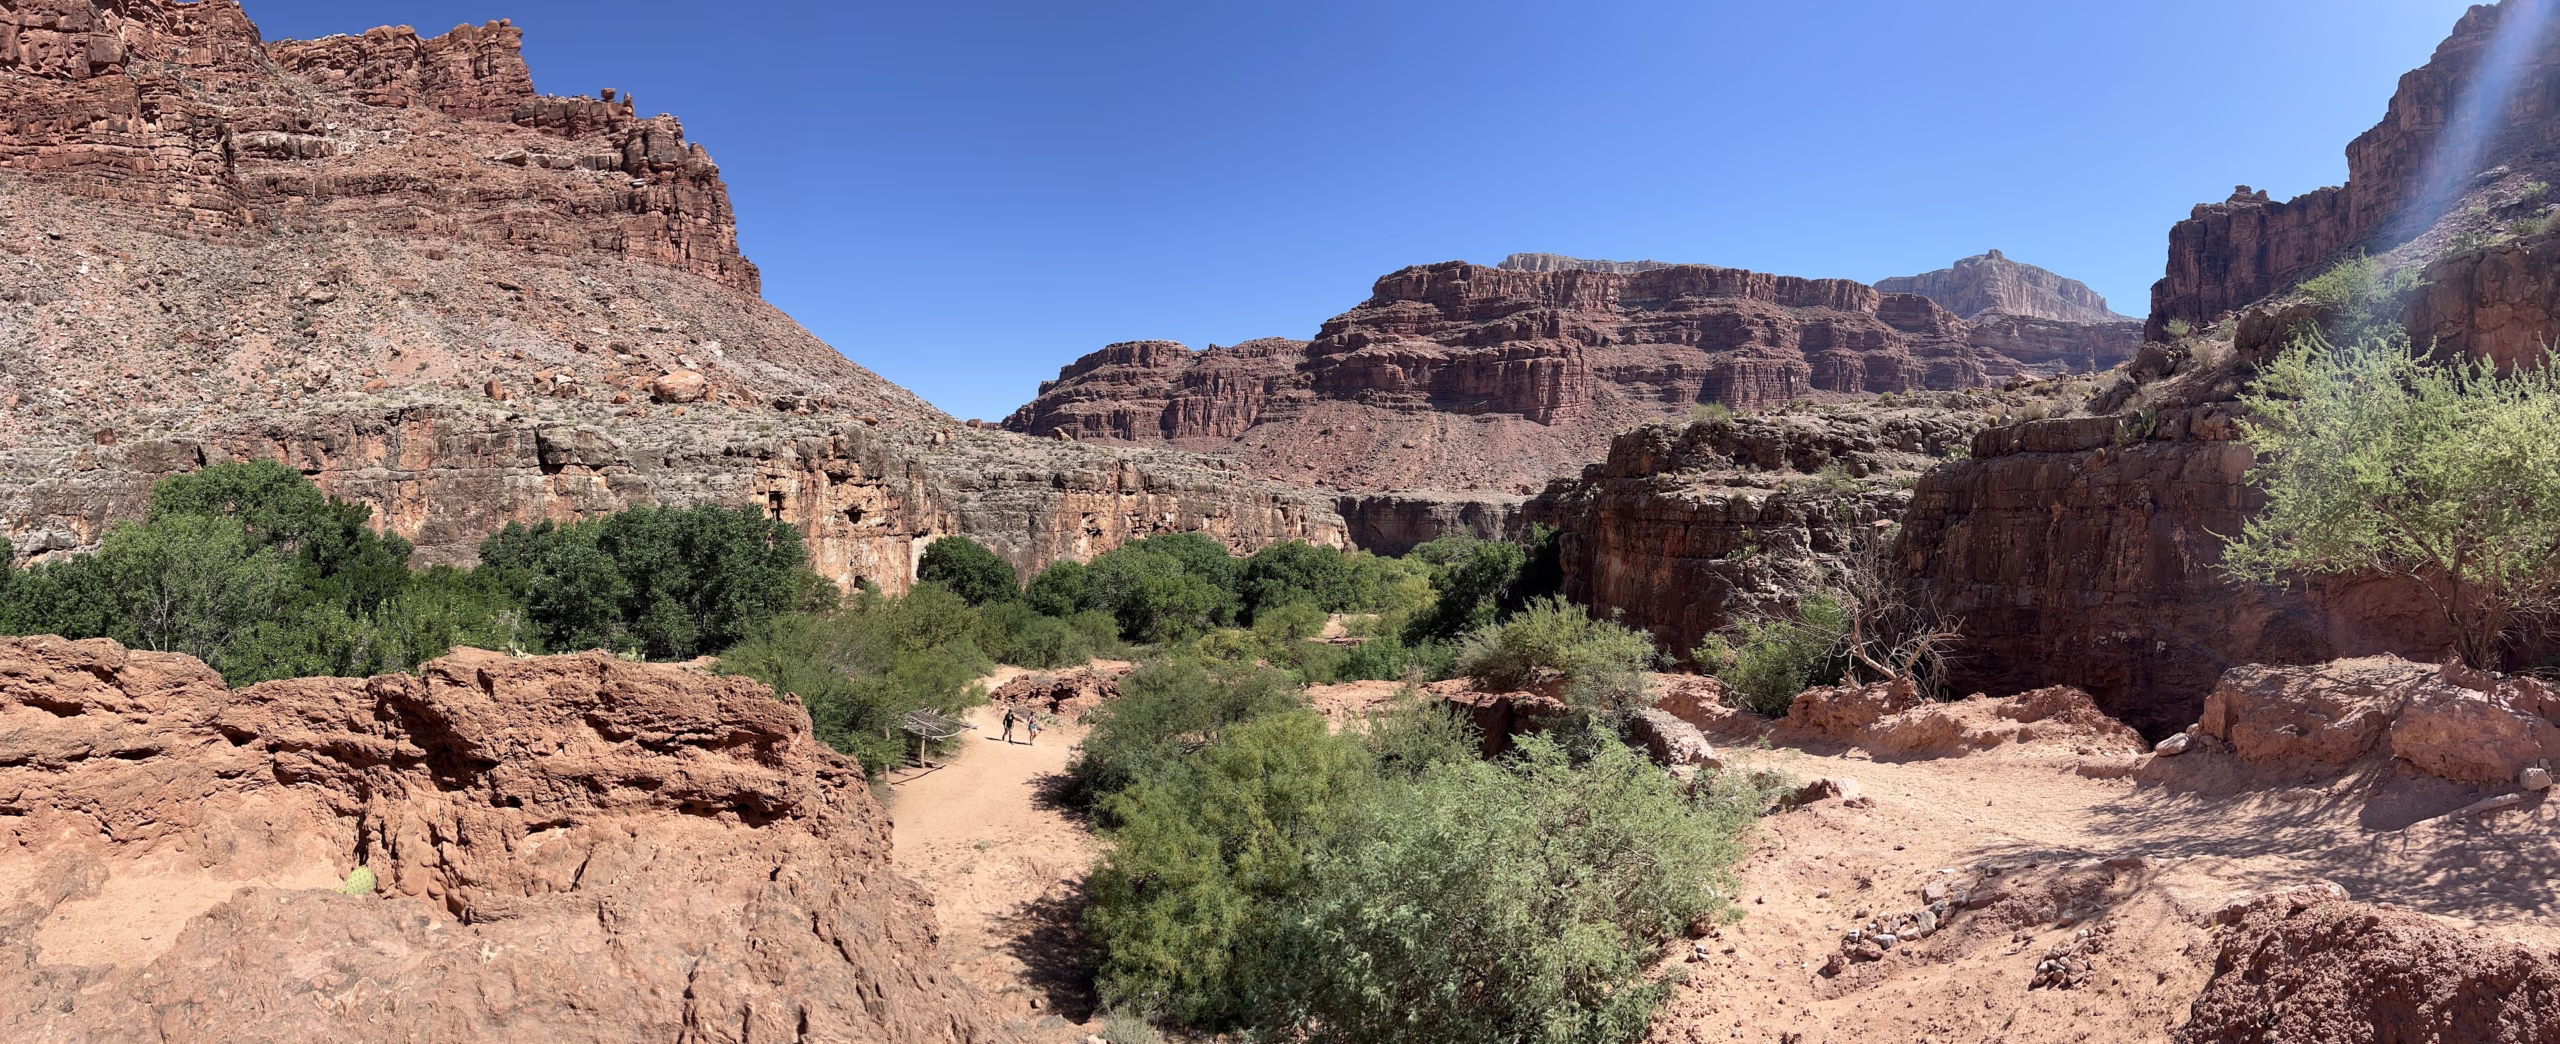
The canyon walls grow taller and straighter near the junction of the Hualapai Canyon and Havasu Canyon, and you can see the mouth of the canyon appear in the distance.
The vegetation becomes noticeably greener as you descend into the Havasu Canyon, with stands of honey mesquite, desert willow and cottonwoods taking root along the waters of Havasu Creek.
You’ll take a hard left, following the signs towards the town of Supai, two miles away.


The gravel of the wash is now replaced by softer dirt and sand trail that more or less follows the turquoise waters of Havasu Creek en route to the village. A sign on the outskirt of town announces your arrival into the village. The wide path leads you past paddocks, homes, and gardens before delivering you to the center of town past newly constructed schools and community buildings.
There’s also a small grocery, a cafe, and a post office where you can mail a post-card that will be delivered out of the canyon via mule train. Photography within the village is restricted, and signage is prominently posted reminding you of this rule.
The path splits past the elementary school, with the right fork taking you to the lodge and the other leaving town to continue towards the waterfalls and the campground. It’s another two miles down a wide, sandy road into the campground.
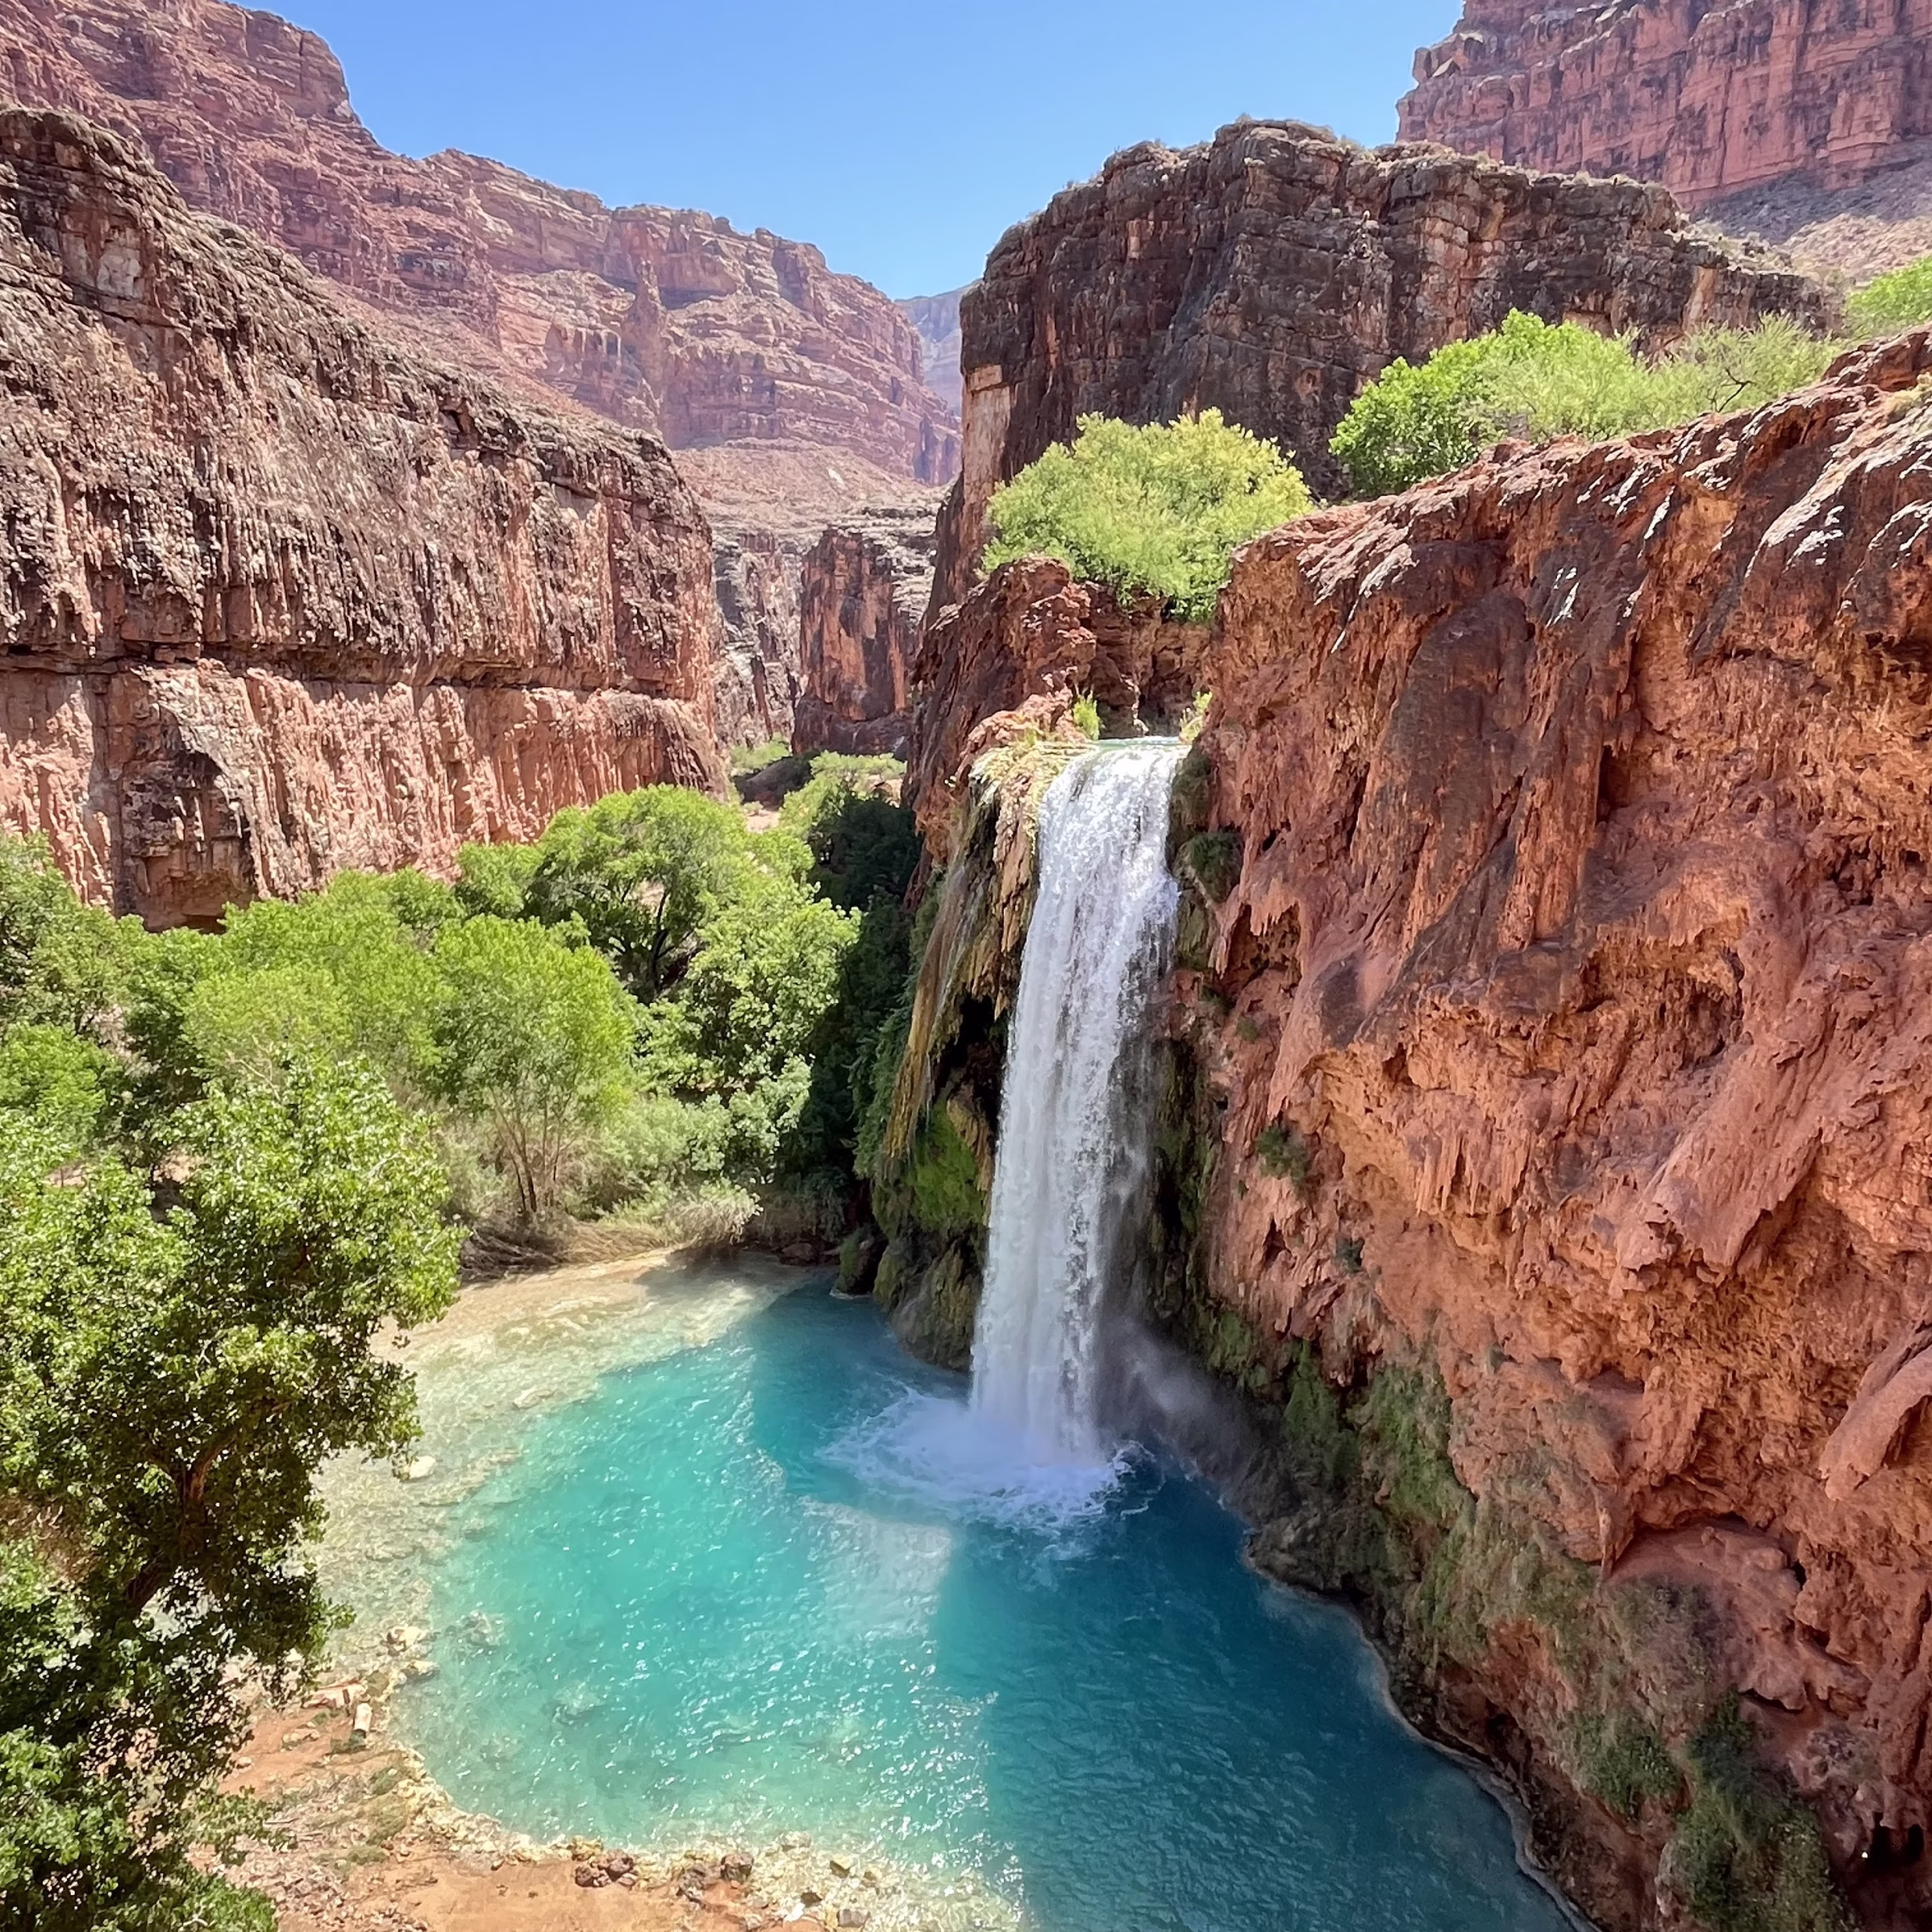
The trail pitches downward one more time and then, suddenly, Havasu Falls appears in its full glory off the right. You do not see it coming! But once in sight it means the campground it not much further. Upon arrival, you’ll want to explore the campground to find a suitable spot to set-up camp. Water is available at Fern Springs, near the campground entrance. The remainder of the day is yours to rest from the hike, settle into camp, and cool down in the travertine pools below Havasu Falls.
Day 2 Havasupai Itinerary: Mooney Falls and Beaver Falls
You’ll want a full day to visit Mooney Falls and Beaver Falls. While this hike isn’t as long as the hike into Havasupai, most people will want a day to recover before hiking back up to Hilltop on their final day. This makes your first full day in the canyon the best day to explore these waterfalls. Pack a lunch, plenty of water (or a water filter), and a headlamp if you plan to spend the day exploring Beaver Falls.

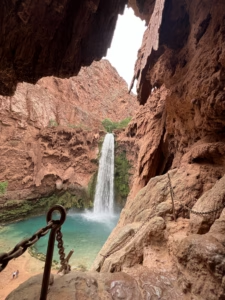
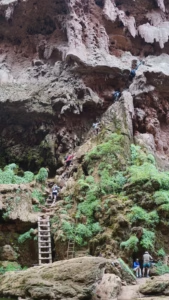
The trail to Mooney Falls begins at the far end of the campground, past the final restroom. Signs lead to a well worn trail cut into the upper layers of the wall, and several coves provide close-up views of the travertine veils, evidence of the shifting paths the creek has taken over millennia.
A naturally formed tunnel cuts through the calcium carbonate mineral deposits and emerges at the top of the the chains.
Click the upper left photo (with the signs) to expand the photo series and learn more about the upper portion of the trail progression.


Descending the Chains at Mooney Falls
The infamous chain section of Mooney Falls is a mostly vertical descent supported partially by a series of heavy chains and wooden ladders. It certainly provides some heart pounding thrills, but unlike other adrenaline inducing routes – like the chain section of Zion’s Angel’s Landing or Yosemite’s Half Dome – you aren’t exposed to sheer drop-offs.
The most dangerous aspect of the chain section is, unsurprisingly, the behavior of other people. Be prepared for one-way traffic on the ladders and chains: most hikers are descending in the morning and climbing up in the afternoon. Going against traffic requires patience and communication: there are not many places to “move aside” to let someone pass.
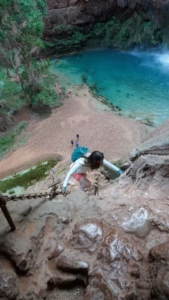
Rushing individuals ahead of you to go faster then they can safely manage is also a recipe for trouble. Be patient and supportive of your fellow campers who are appropriately challenging themselves – either mentally or physically. It may feel like a long wait, but it only takes about 10 minutes to get up or down the chains, and those ahead of you will be able to go faster without the additional pressure.
The stone steps and chains get slick from the spray of the waterfall. A pair of well-fitting grippy gloves can provide the extra traction you’ll need to get a confident handhold and provide insulation from the cold metal of the chains. Midway through the season, a pile of gloves begins to form at the top of the falls. These are not put there for people to use; they are trash left there by irresponsible campers who didn’t want to pack out what they packed in. Bring your own pair of gloves, and then take them out with you. If you choose to use a wet, smelly pair from ‘the pile’, commit now to packing them out of the canyon with you to trash later.
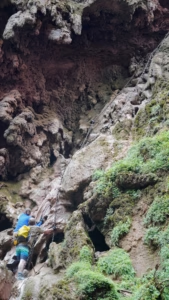
At 200 ft (61 m), Mooney Falls is the tallest waterfall along Havasu Creek. The undercurrent can be serious, and swimming in the pool below Mooney Falls is not recommended. Fortunately there are numerous opportunities to do so further down the creek.
Facing downstream, you’ll locate the trail to Beaver Falls towards the left canyon wall. Over the next three miles it criss-crosses Havasu Creek several times in between large patches of wild grapes. Unlike the gravely wash of the Havasuapi Trail, the trail to Beaver Falls is mostly dirt or sand. A lightweight hike-able water-shoe that you can keep on for both the wet and dry parts of the trail, and that will provide traction on the chain section, is ideal.
Keep your eyes peeled for the native desert bighorn sheep! This is where you are most likely to spot them.


Most of the hike is easy-going, but there are a few sets of ladders to climb as you near Beaver Falls. The first is sometimes referred to as the ‘Palm Tree Ladder’ because of its location right past a very large palm tree growing adjacent to the trail (you actually pass under the palm tree to access the ladders). This ladder series provides access to a higher section of the canyon above the creek where the trail continues. This is the most significant climb en route to Beaver Falls.


The second series of ladders take you down towards Beaver Falls. The trail veers left past the sign for the falls, but is not always well marked. The ladders down to the travertine pools will let you know you’re on the right track. If you miss the turn-off (taking the high route, rather than the low route), you’ll shortly encounter the boundary of Grand Canyon National Park.
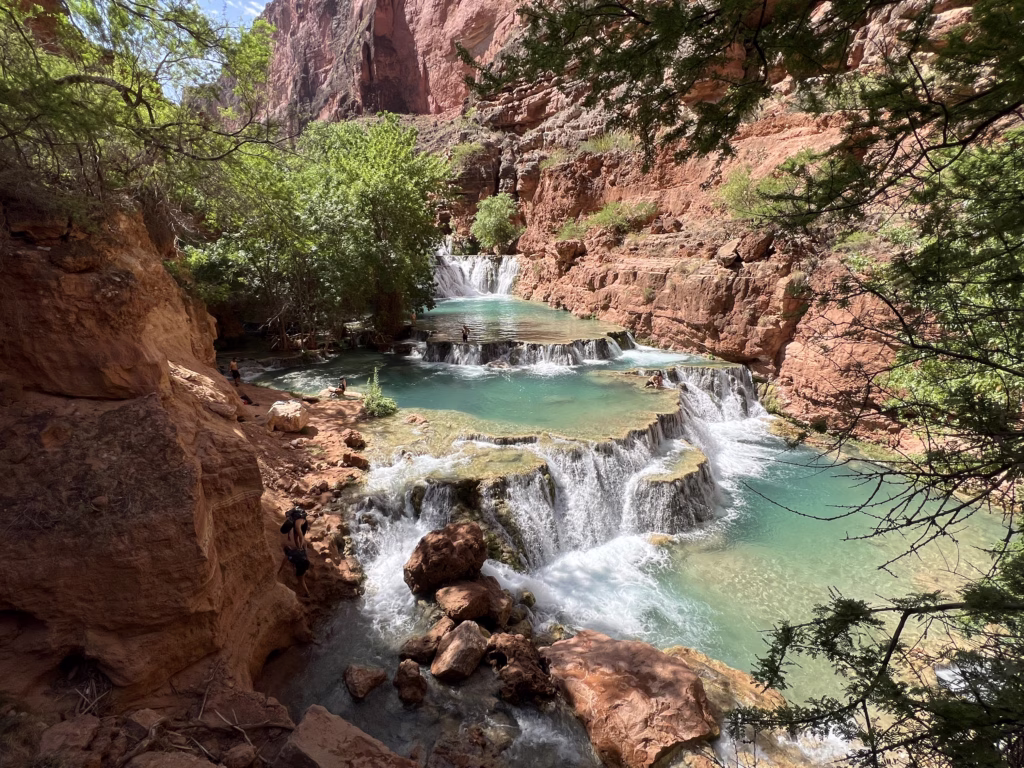
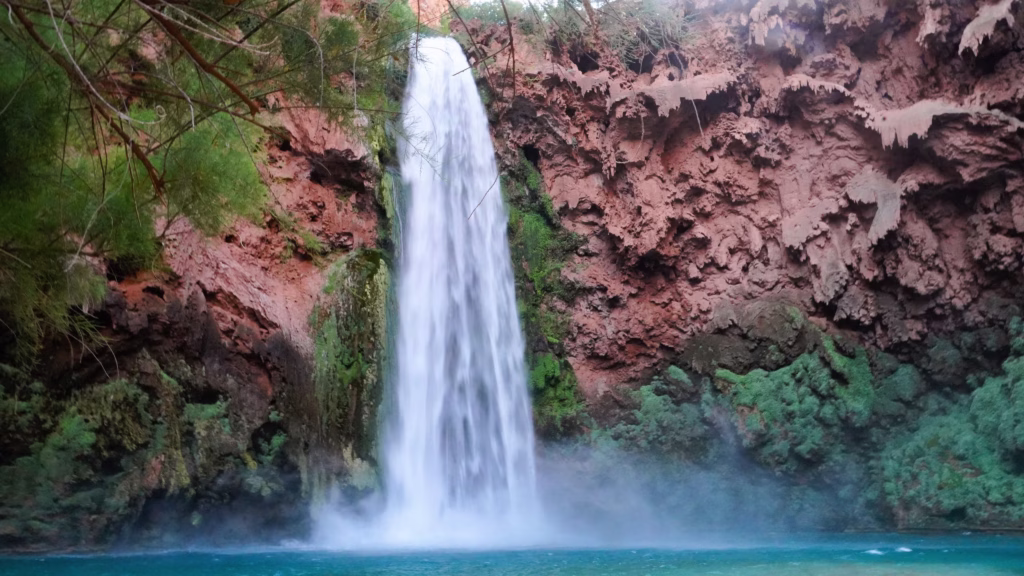
Beaver Falls is one of the most magical places along Havasu Creek. Settle in for a day of swimming in the turquoise pools and hanging out on the travertine terraces. In the summer months, the water hovers around the low 70°F (21°C) – the ideal temperature to combat the midday heat; in spring and fall it will drop into the 60s.
Remember that cliff jumping is not allowed anywhere on Havasupai land. Serious injuries occur in Havasuapai every year, most commonly from ignoring posted rules and entering the canyon unprepared for the heat and isolation. Beaver Falls is remote and helicopter rescue cannot be guaranteed.


By the afternoon, the sun will dip below the canyon walls casting Beaver Falls back into the shade. Remember you still have the hike back to Mooney Falls, up the chains, and into the campground so time your departure accordingly so that you can do not have to navigate the trail in the dark.
Day 3 Havasupai Itinerary: Supai Village & Havasu Falls
After a long day hiking the canyon on your second day, spend your third day day relaxing around the campground and at the waterfalls nearest to the village of Supai. While you needed to wake very early on Day 1 to get an early start on the trailhead, and early enough on Day 2 to experience the falls ahead of the crowds, on Day 3 there’s no reason to rush. Wake slowly and enjoy the splendor of camp.
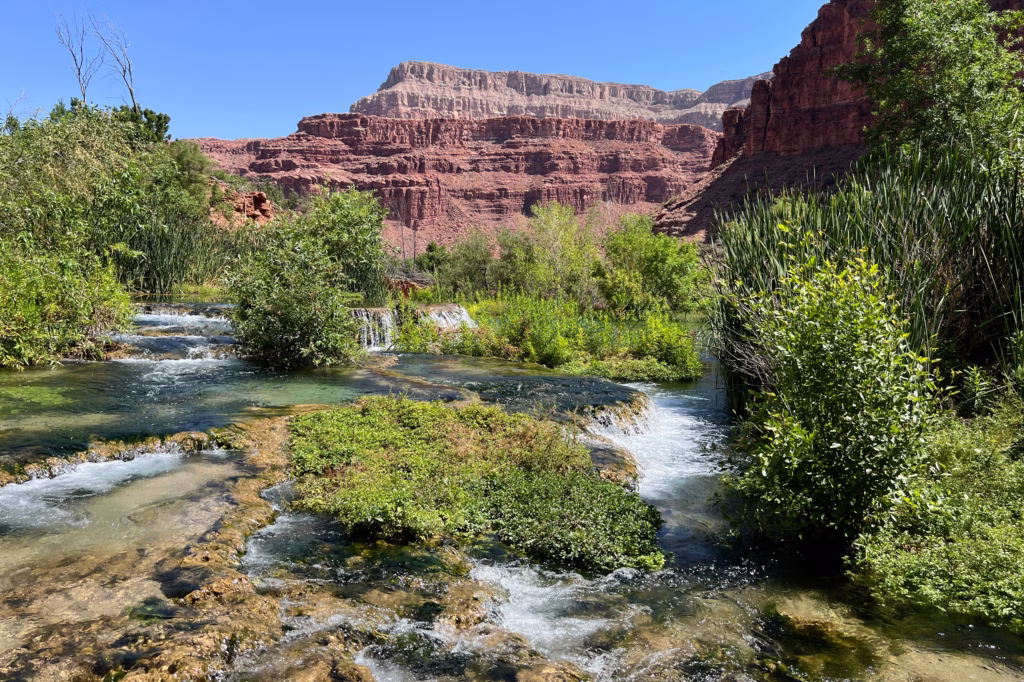
There are three named waterfalls located along the road upstream of the campground towards Supai Village that can be accessed from the trail: Havasu Falls, Fifty-Foot Falls and the New Navajo Falls. This is the best day to explore them on your own time.
*Note, in June 2025 a flash flood swept through Havasupai, diverting the flow of Havasu Creek. Little Navajo Falls has since run dry, and a new falls, New Navajo Falls, has been created upstream. The photos below are from May 2025.


Each of these falls have their own personality and defining characteristics and are located a short way off the main trail into town. Shade is extremely limited in this section of the canyon. If you’re visiting Havasupai in 2026, you’ll be among the first visitors to experience the newly formed and rerouted waterfalls along Havasu Creek.
The day you explore the upstream falls is also the day to do any desired activities in Supai Village. In 2026, the fry bread hut that used to be at the top of Havasu Falls was relocated to the village. Here you can order fry bread with a variety of toppings and cold drinks. Inside the cafe, the menu has a variety of grilled and fried offerings, including french fries, burgers and grilled cheese sandwiches. Bring cash if you plan to make any purchases in Supai Village. While some shops have card readers, connectivity can be unreliable.


You can even send a postcard by mule train from the post office (open weekdays; hours may vary) that will be bear a special cancellation mark – the last Mule Train postal route left in the US! Postcards and stamps can be purchased when the souvenir shops and post-office are open, otherwise you can bring your own stamped post-card to drop into the post-office box on your way through Supai.
You’ll see evidence of the past floods as well as side roads that venture into other parts of Havasupai territory. Stay on the main road and marked trails and respect any areas off-limits to tourists.


Day 4 Recommended Itinerary: Hike out the Havasu Trail
Your final day in Havasupai requires you to hike back out on the same trail that you came in on three days earlier. Similarly, you’ll want to get an early start to avoid hiking out in the heat of the day. This can mean leaving the campground as early as 2am in order to get to the switchbacks before the sun rises over the canyon.
While you must vacate your campsite the morning of your intended departure, there is nothing requiring you to hike out the morning. While it is not advisable for inexperienced hikers to attempt the hike out in the dark, departing as the sun begins to set is an option for those with experience night-hiking.
Planning your own trip to Havasupai and the waterfalls of Havasu Creek? Check out our Havasupai Falls Reservations and Camping Guide
Are you planning a trip to Havasupai? Leave your questions and comments about this recommended 4 day/3 night itinerary in the comments below.